
Kasia’s Weekly Threads - Issue 70
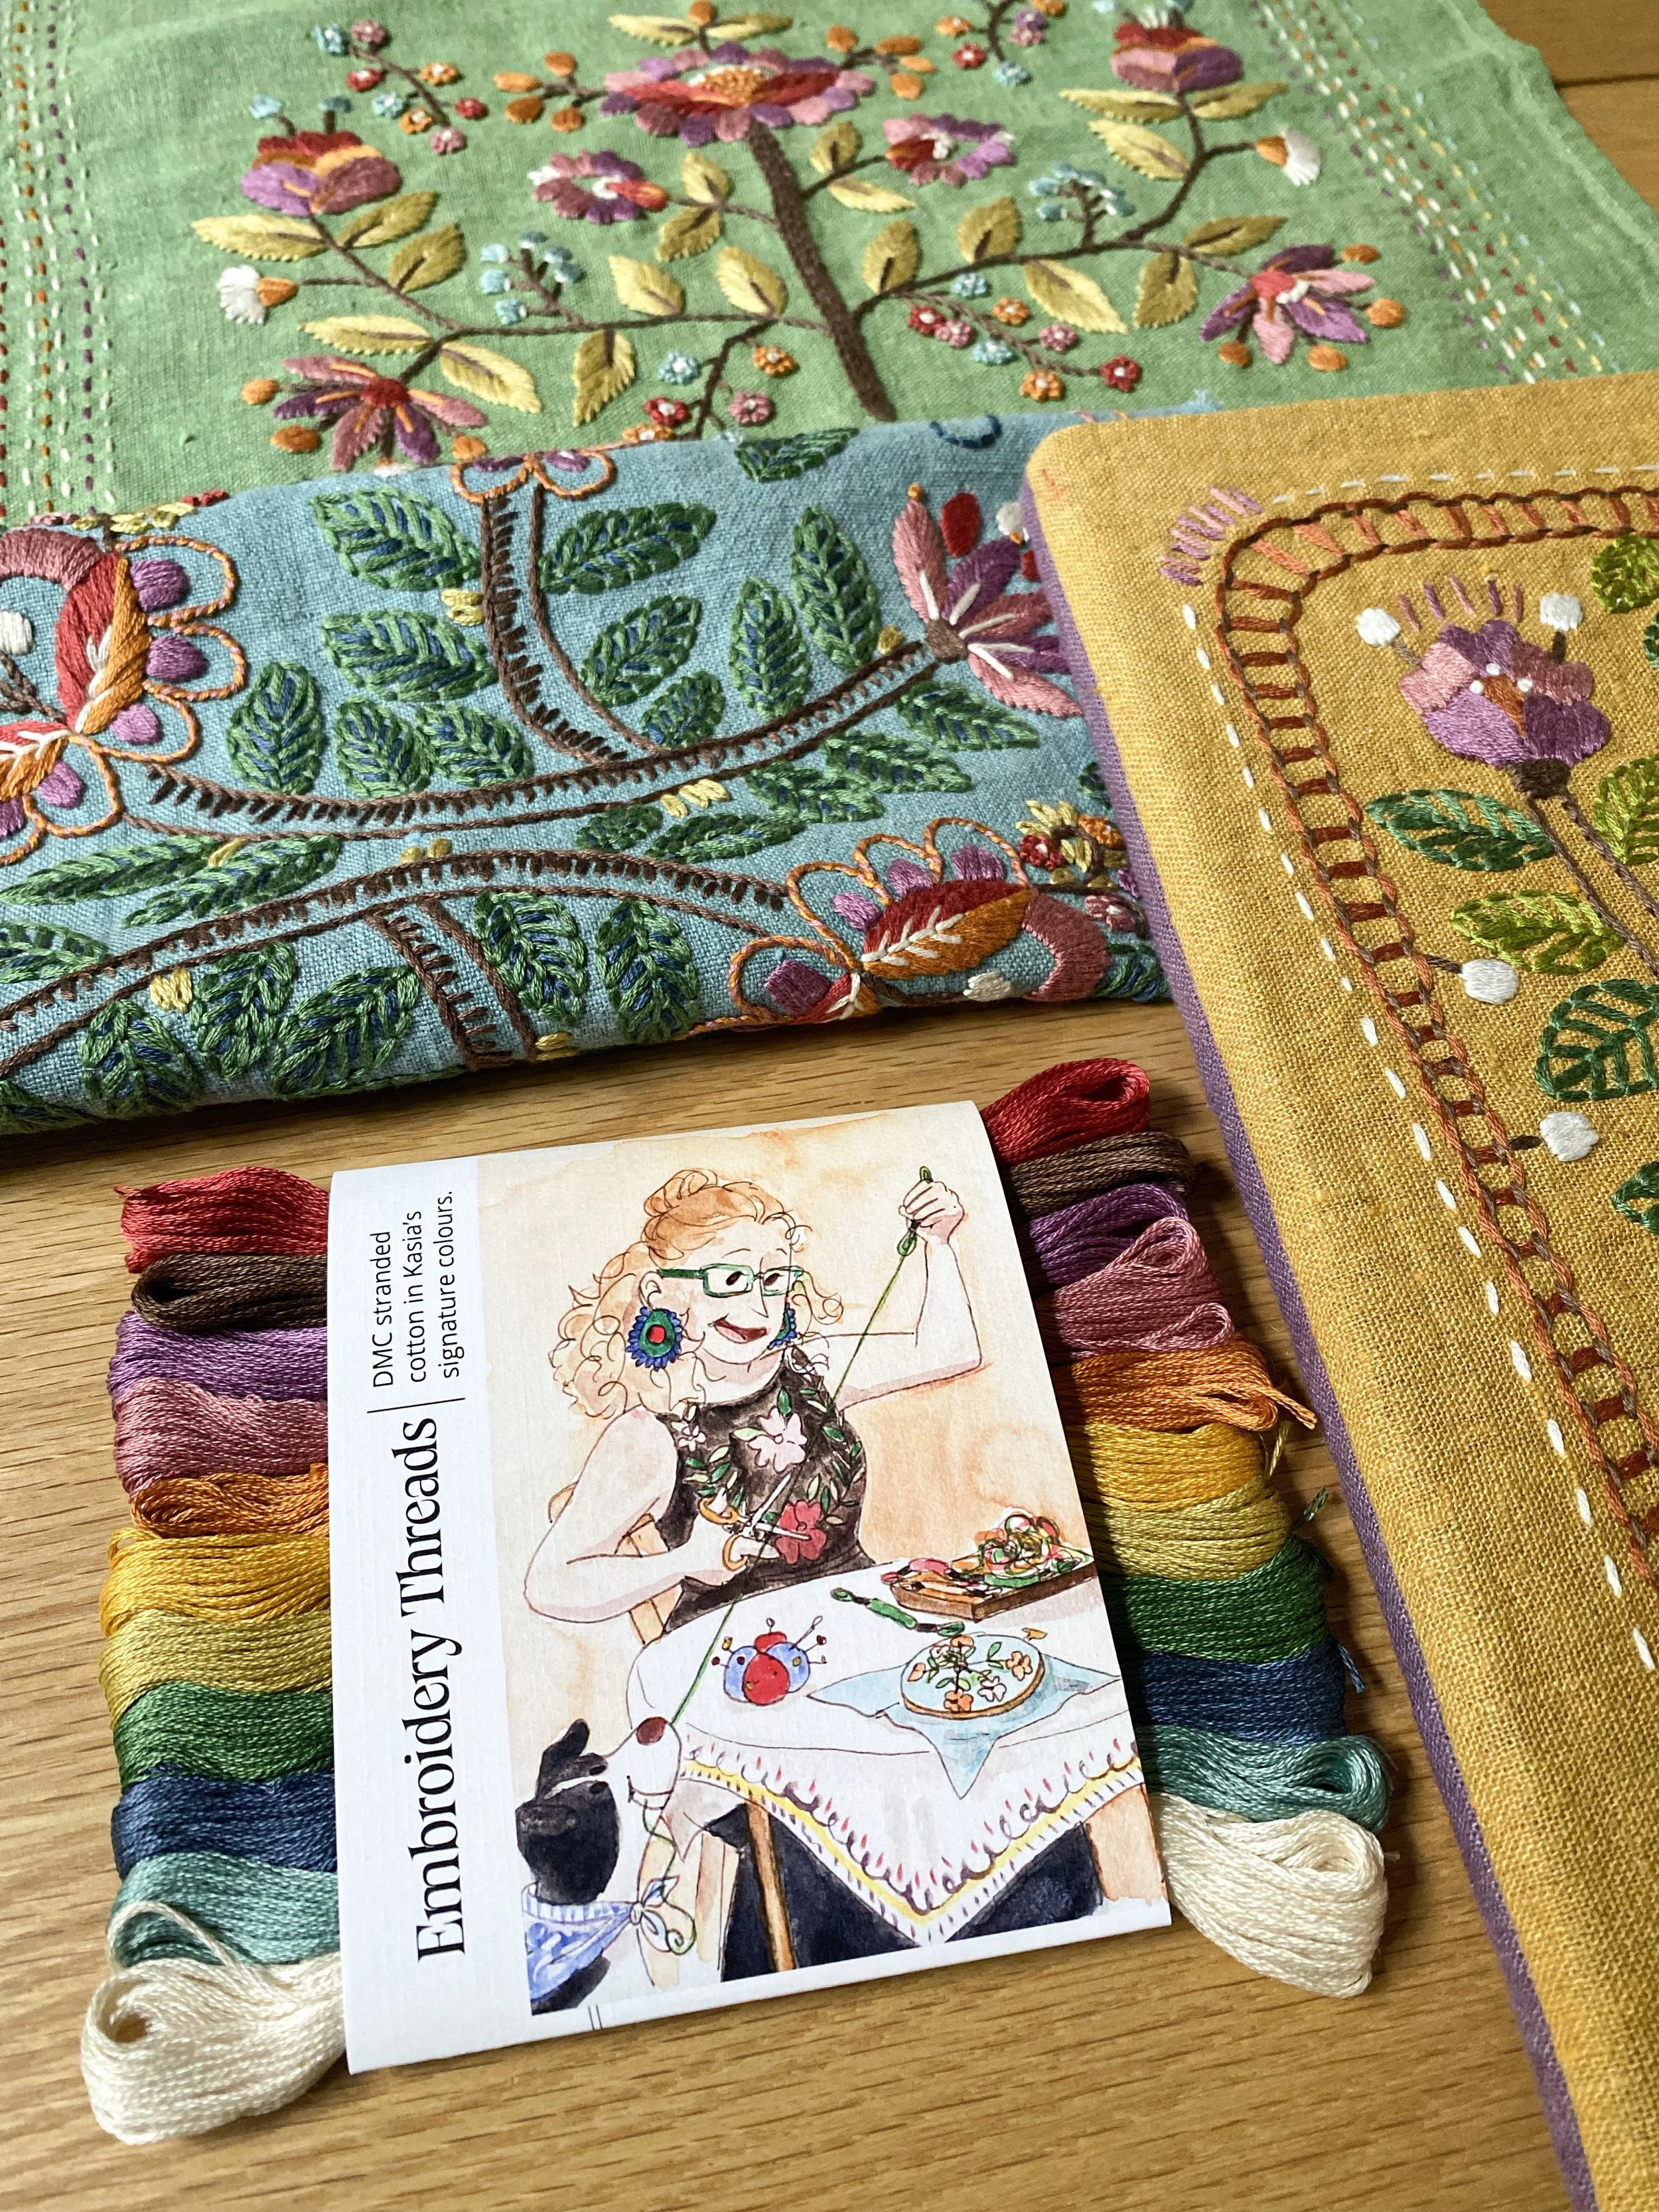
Hello friends!
I’m so excited to write todays post because I just know you’re going to love my new contraption that I’m sharing below.
This week we also take a close up look at the Wheatear Stitch, a woollen cardigan rescued from moth holes by beautiful embroidery and six different colour versions of the same design.
But first…
Meet the Thread-O-Matic 3000.
This is the third iteration of the invention, thus the “3000”. The “Thread-O-Matic” makes me think of Wallace and Gromit who I love with all my heart.
It’s been in my mind for a couple of years as a response to needing and wanting to keep my threads tidy while I work on a project. I’ve made a couple of other versions of it but they were unnecessarily complicated. I tend to overthink things sometimes. This one is simple to make and simple to use. Win-win.
First please have a look at this 12 second video and then see the steps below how you can make your own. I know you’ll love it!
Step 1
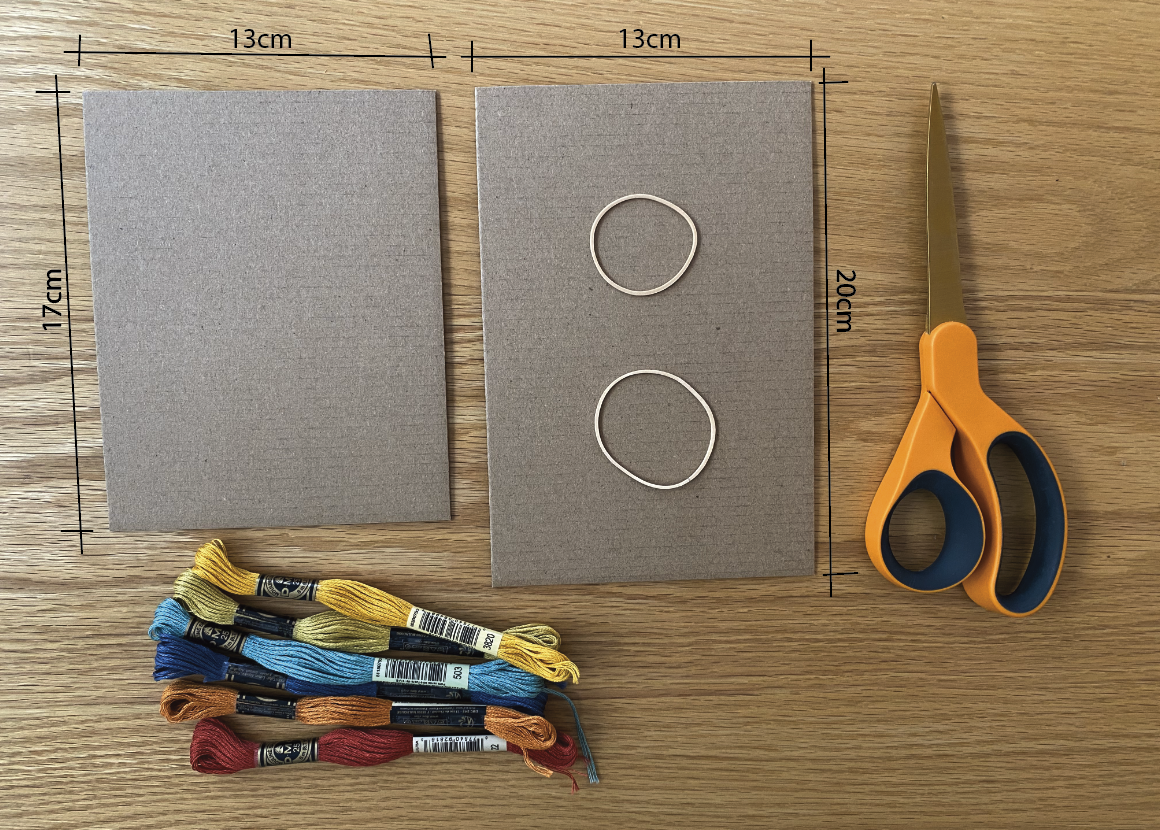
You’ll need two pieces of cardboard like the kind from a cardboard box, maybe an Amazon delivery box. It needs to be rigid but still be able to be cut with scissors. The two pieces will measure 13cm x 17cm and 13cm x 20cm. (Approximately 5×7 inches and 5× 8 inches). You’ll also need two rubber bands. This width will comfortably fit six skeins.
Step 2
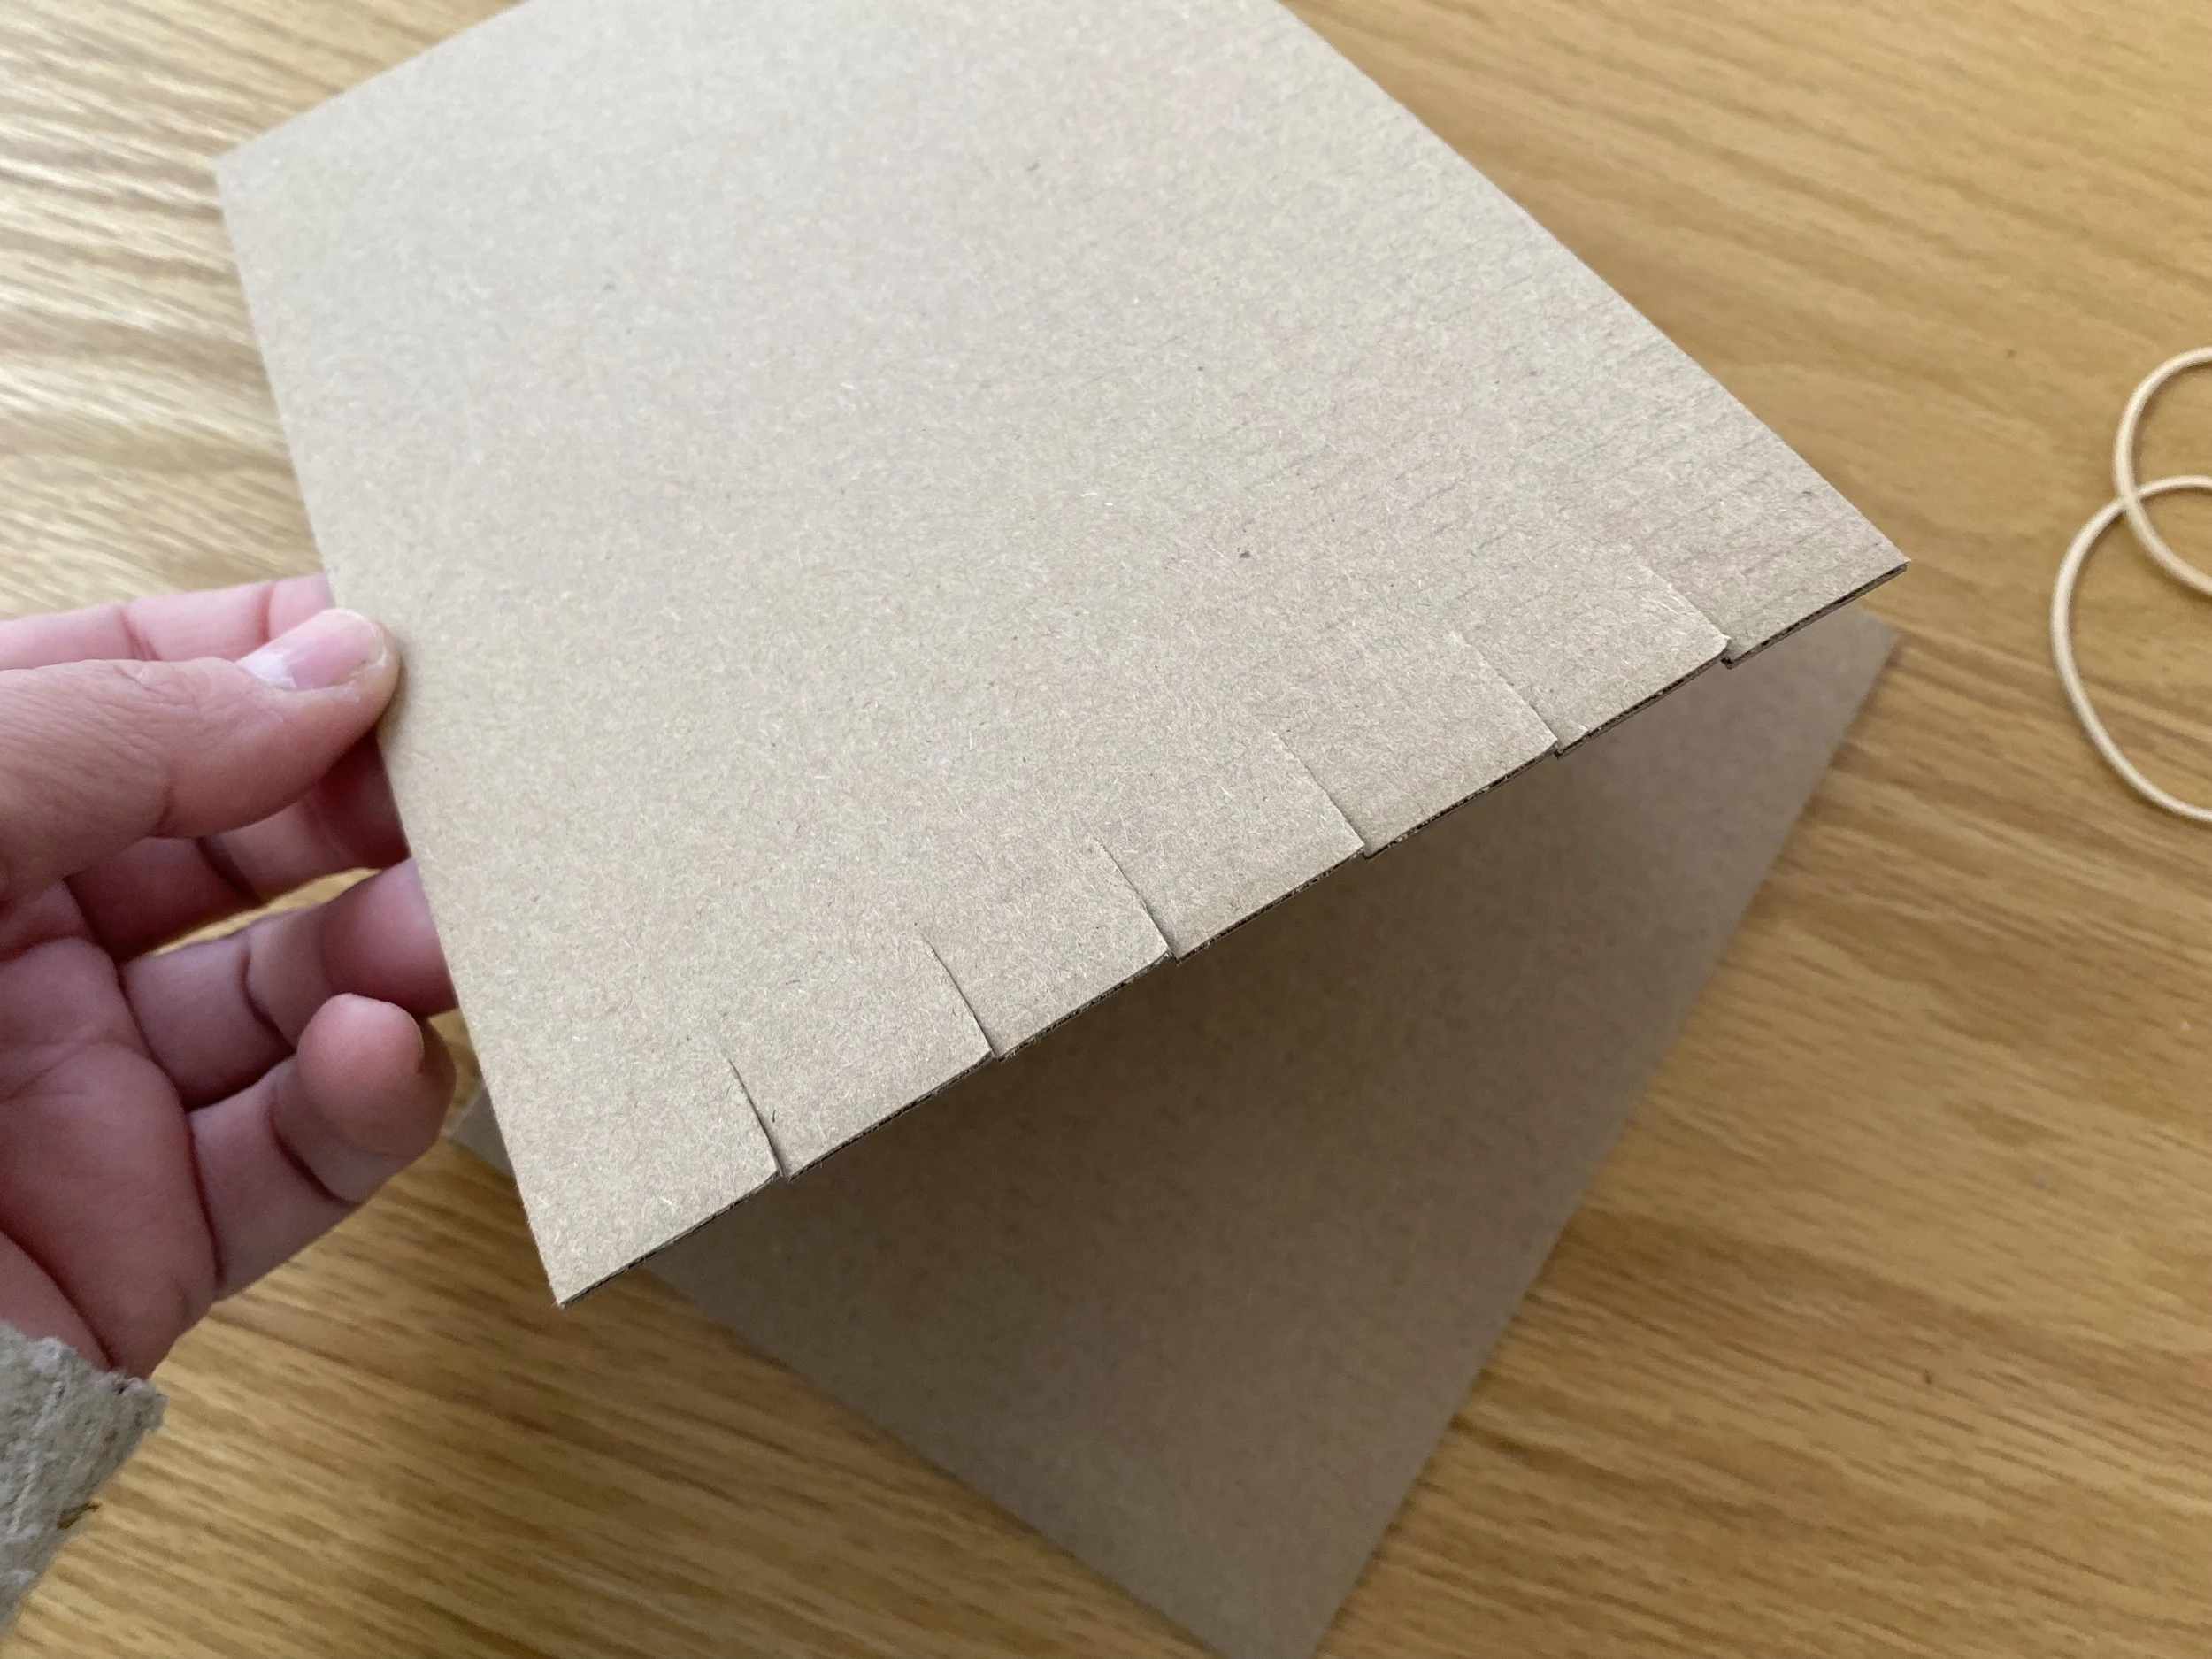
Make six cuts (for the six skeins) of about 1.5cm (about half an inch) deep along the short end of the bigger piece of cardboard. Make them evenly spaced apart.
Step 3
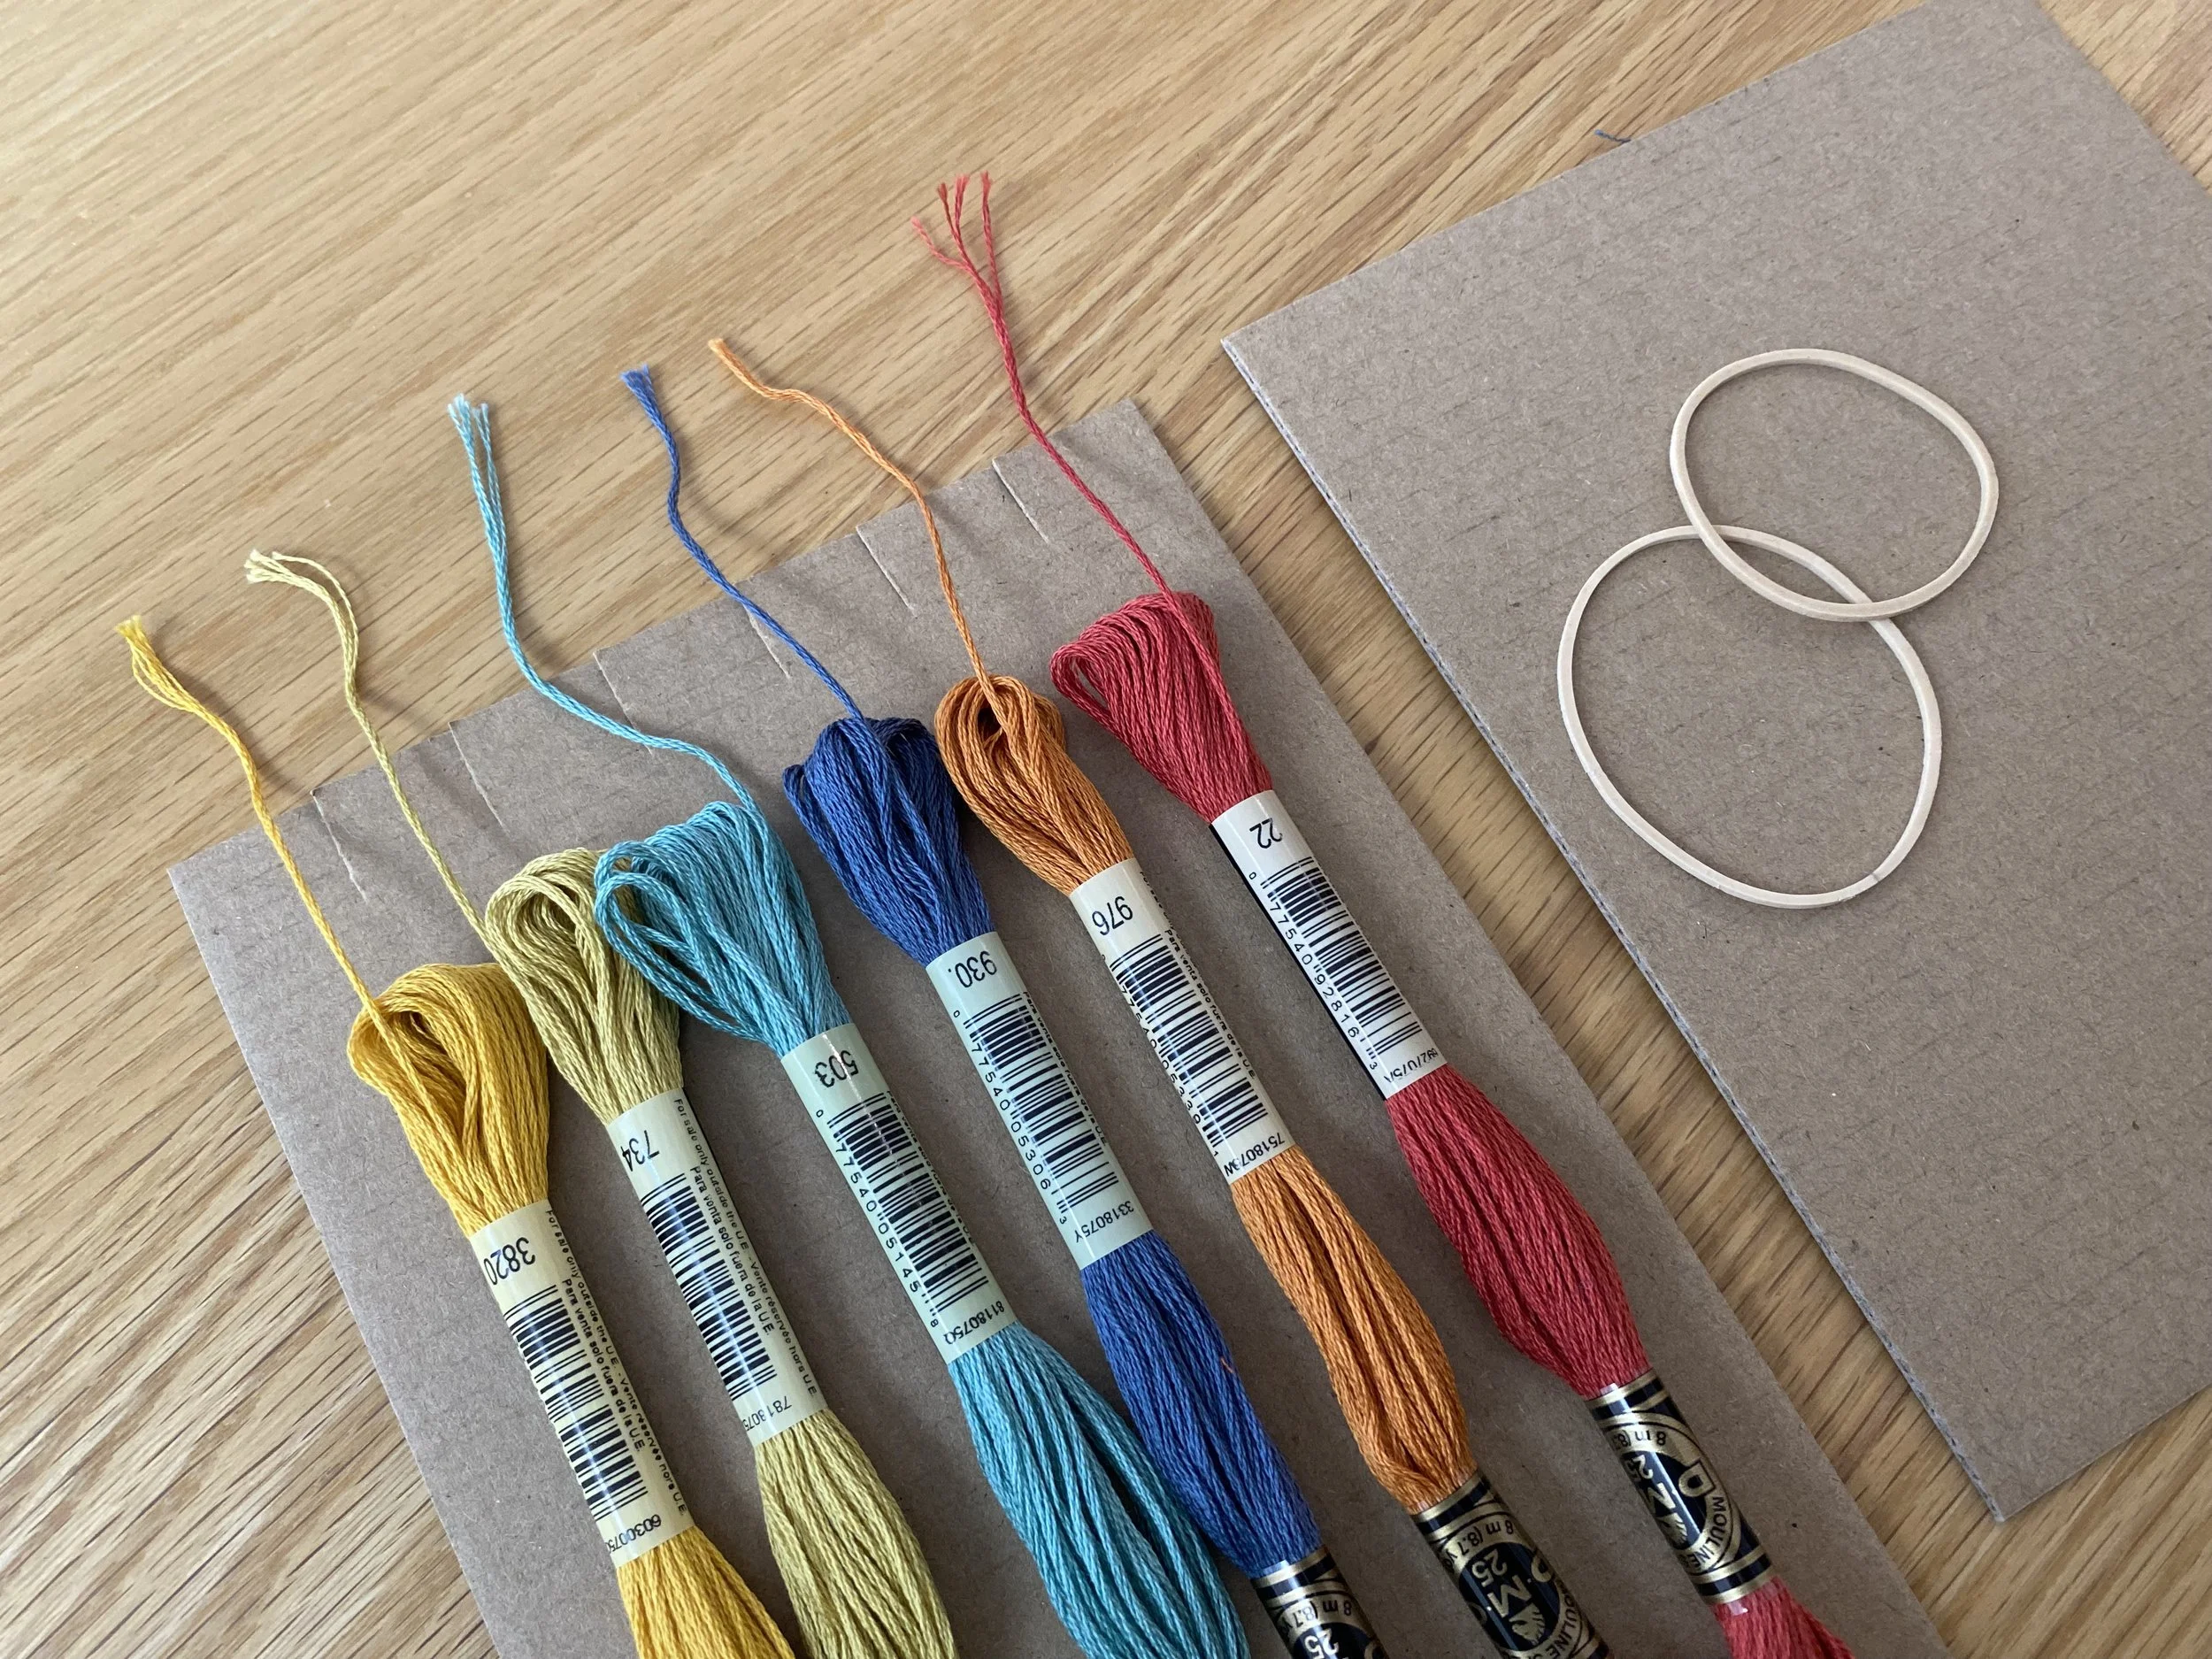
Lay down your skeins on the bigger piece of cardboard with the numbered tags facing toward the side with the six cuts. Pull the ends out to about the length you can see here.
Step 4
Place the smaller piece on top, lining up the bottom parts and making sure the pulled out thread ends are visible and long enough to grab later. Next you’ll secure the pieces together with the two rubber bands. I wrapped each band around twice to hold the skeins securely.
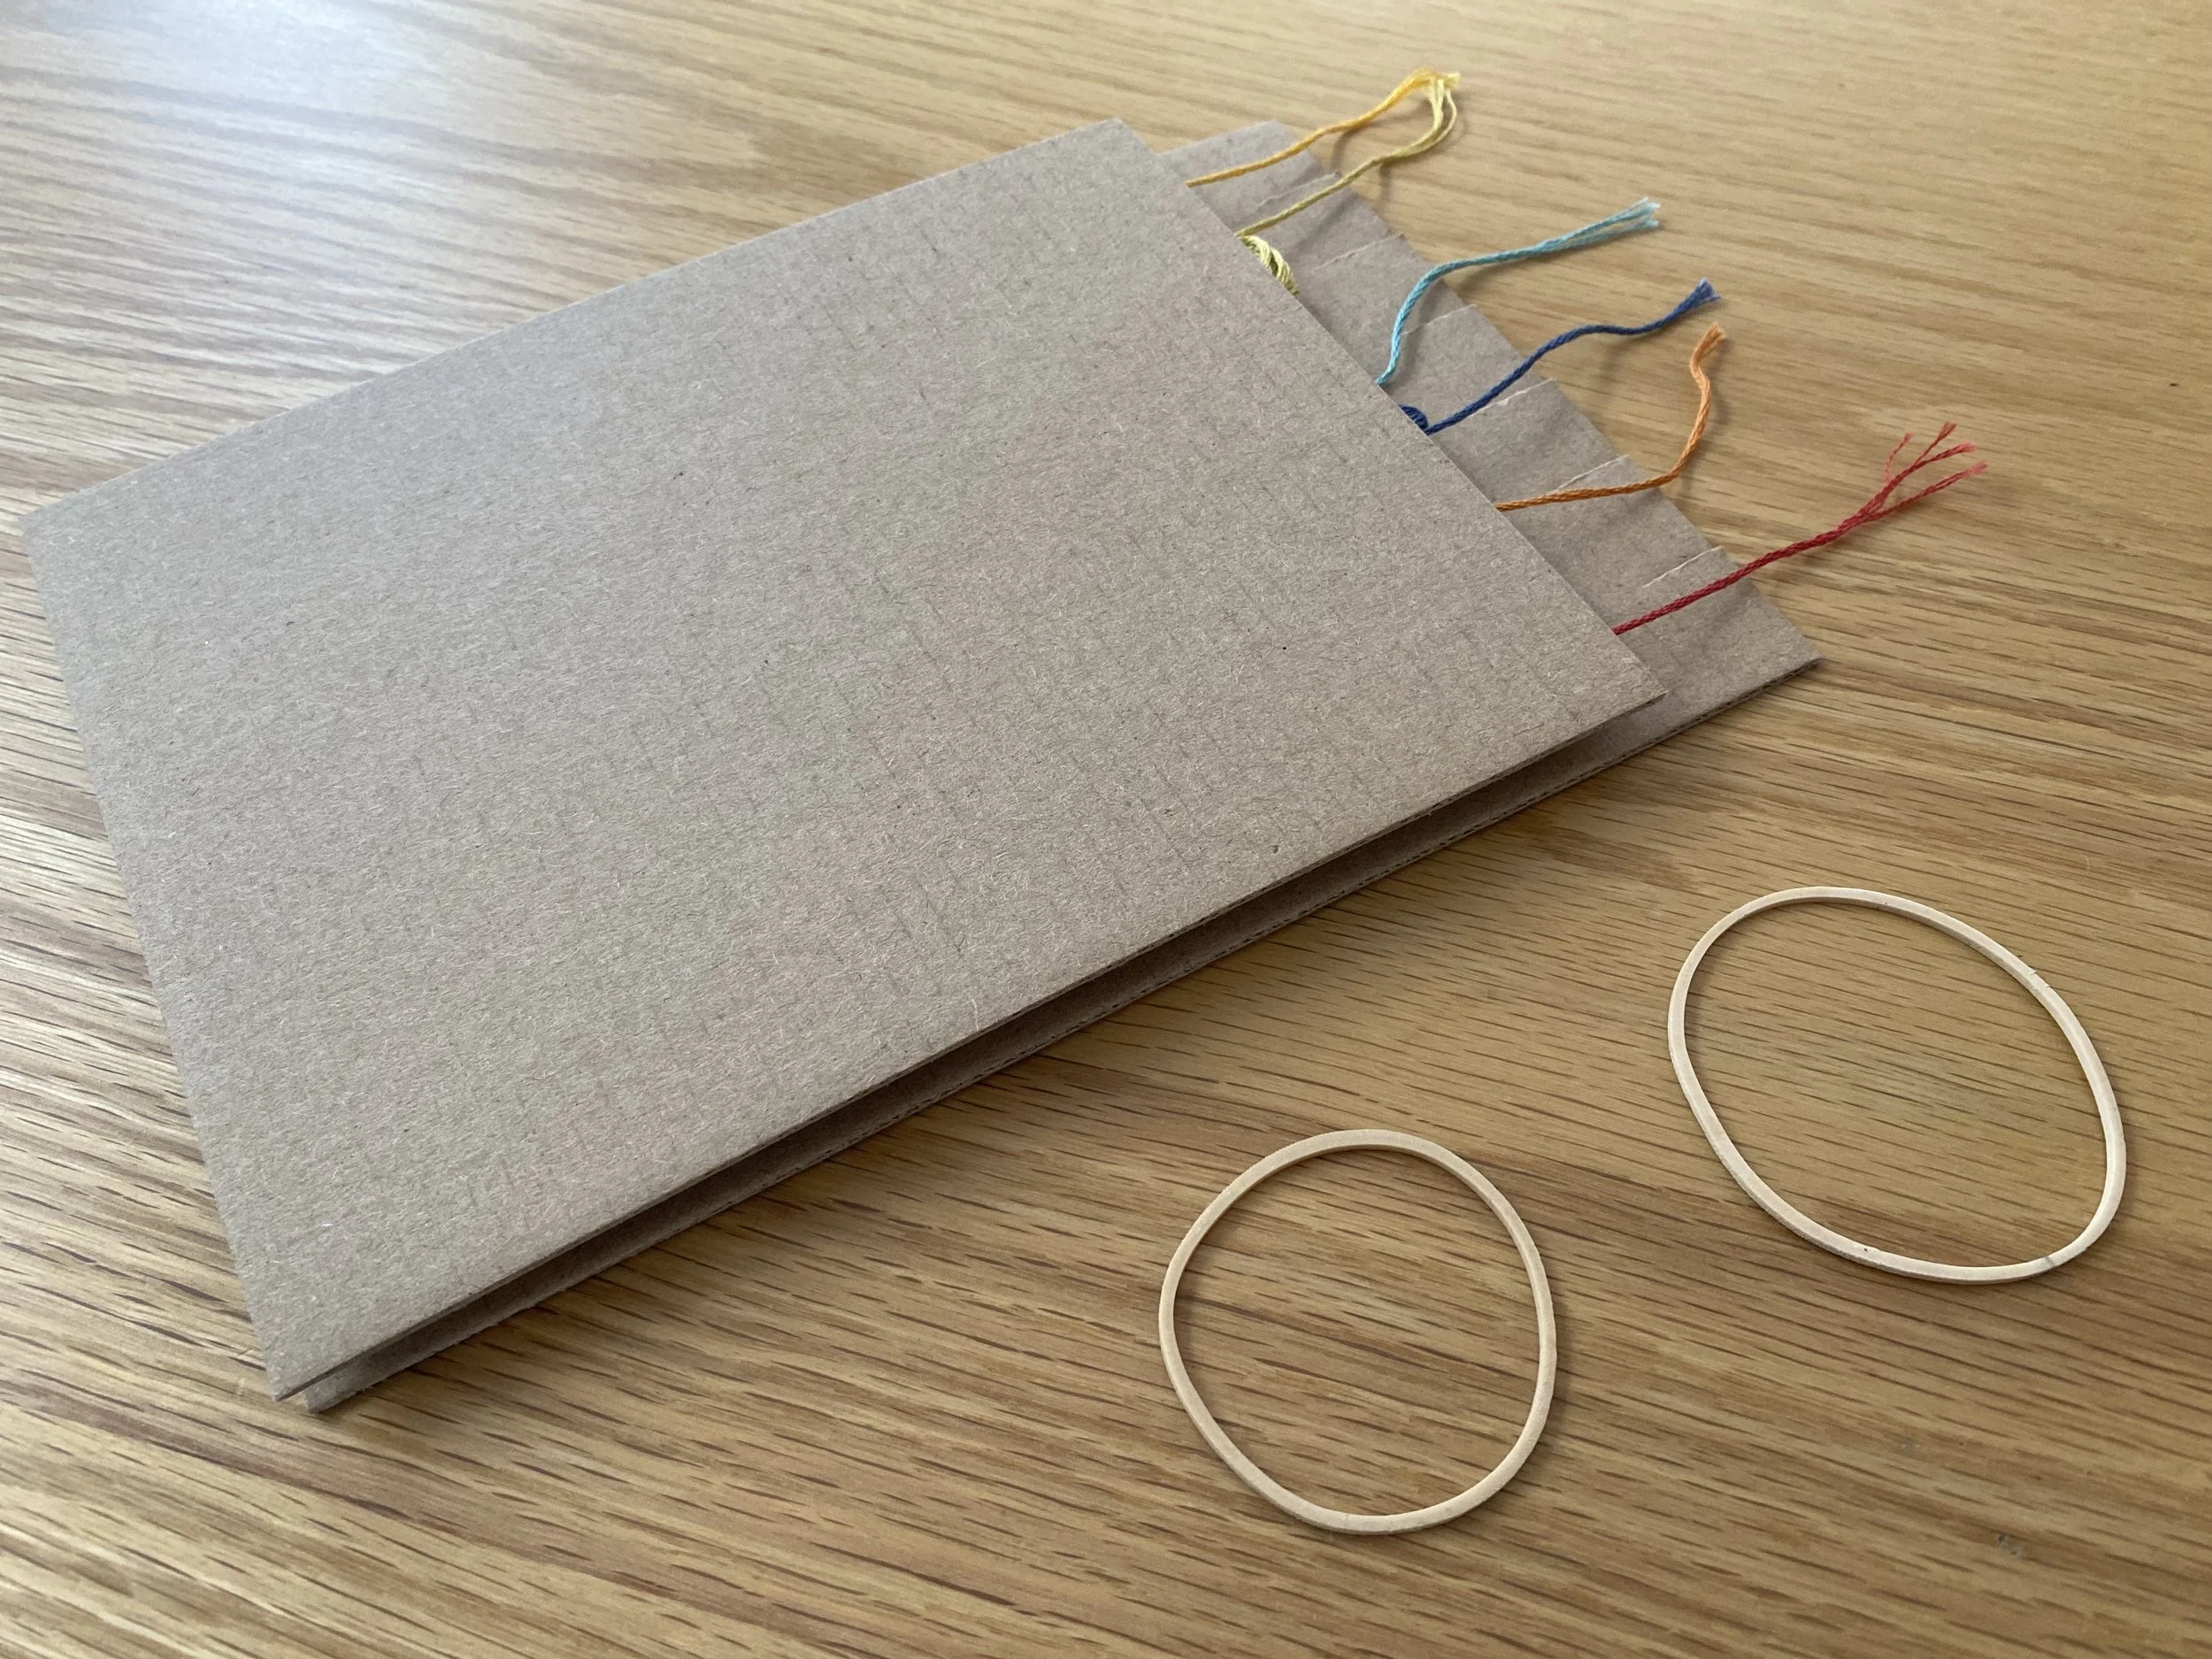
Step 5
Once the rubber bands are holding the pieces firmly in place, pull each end through each cut so it’s secure and long enough on the back and easy to grab, pull and snip.
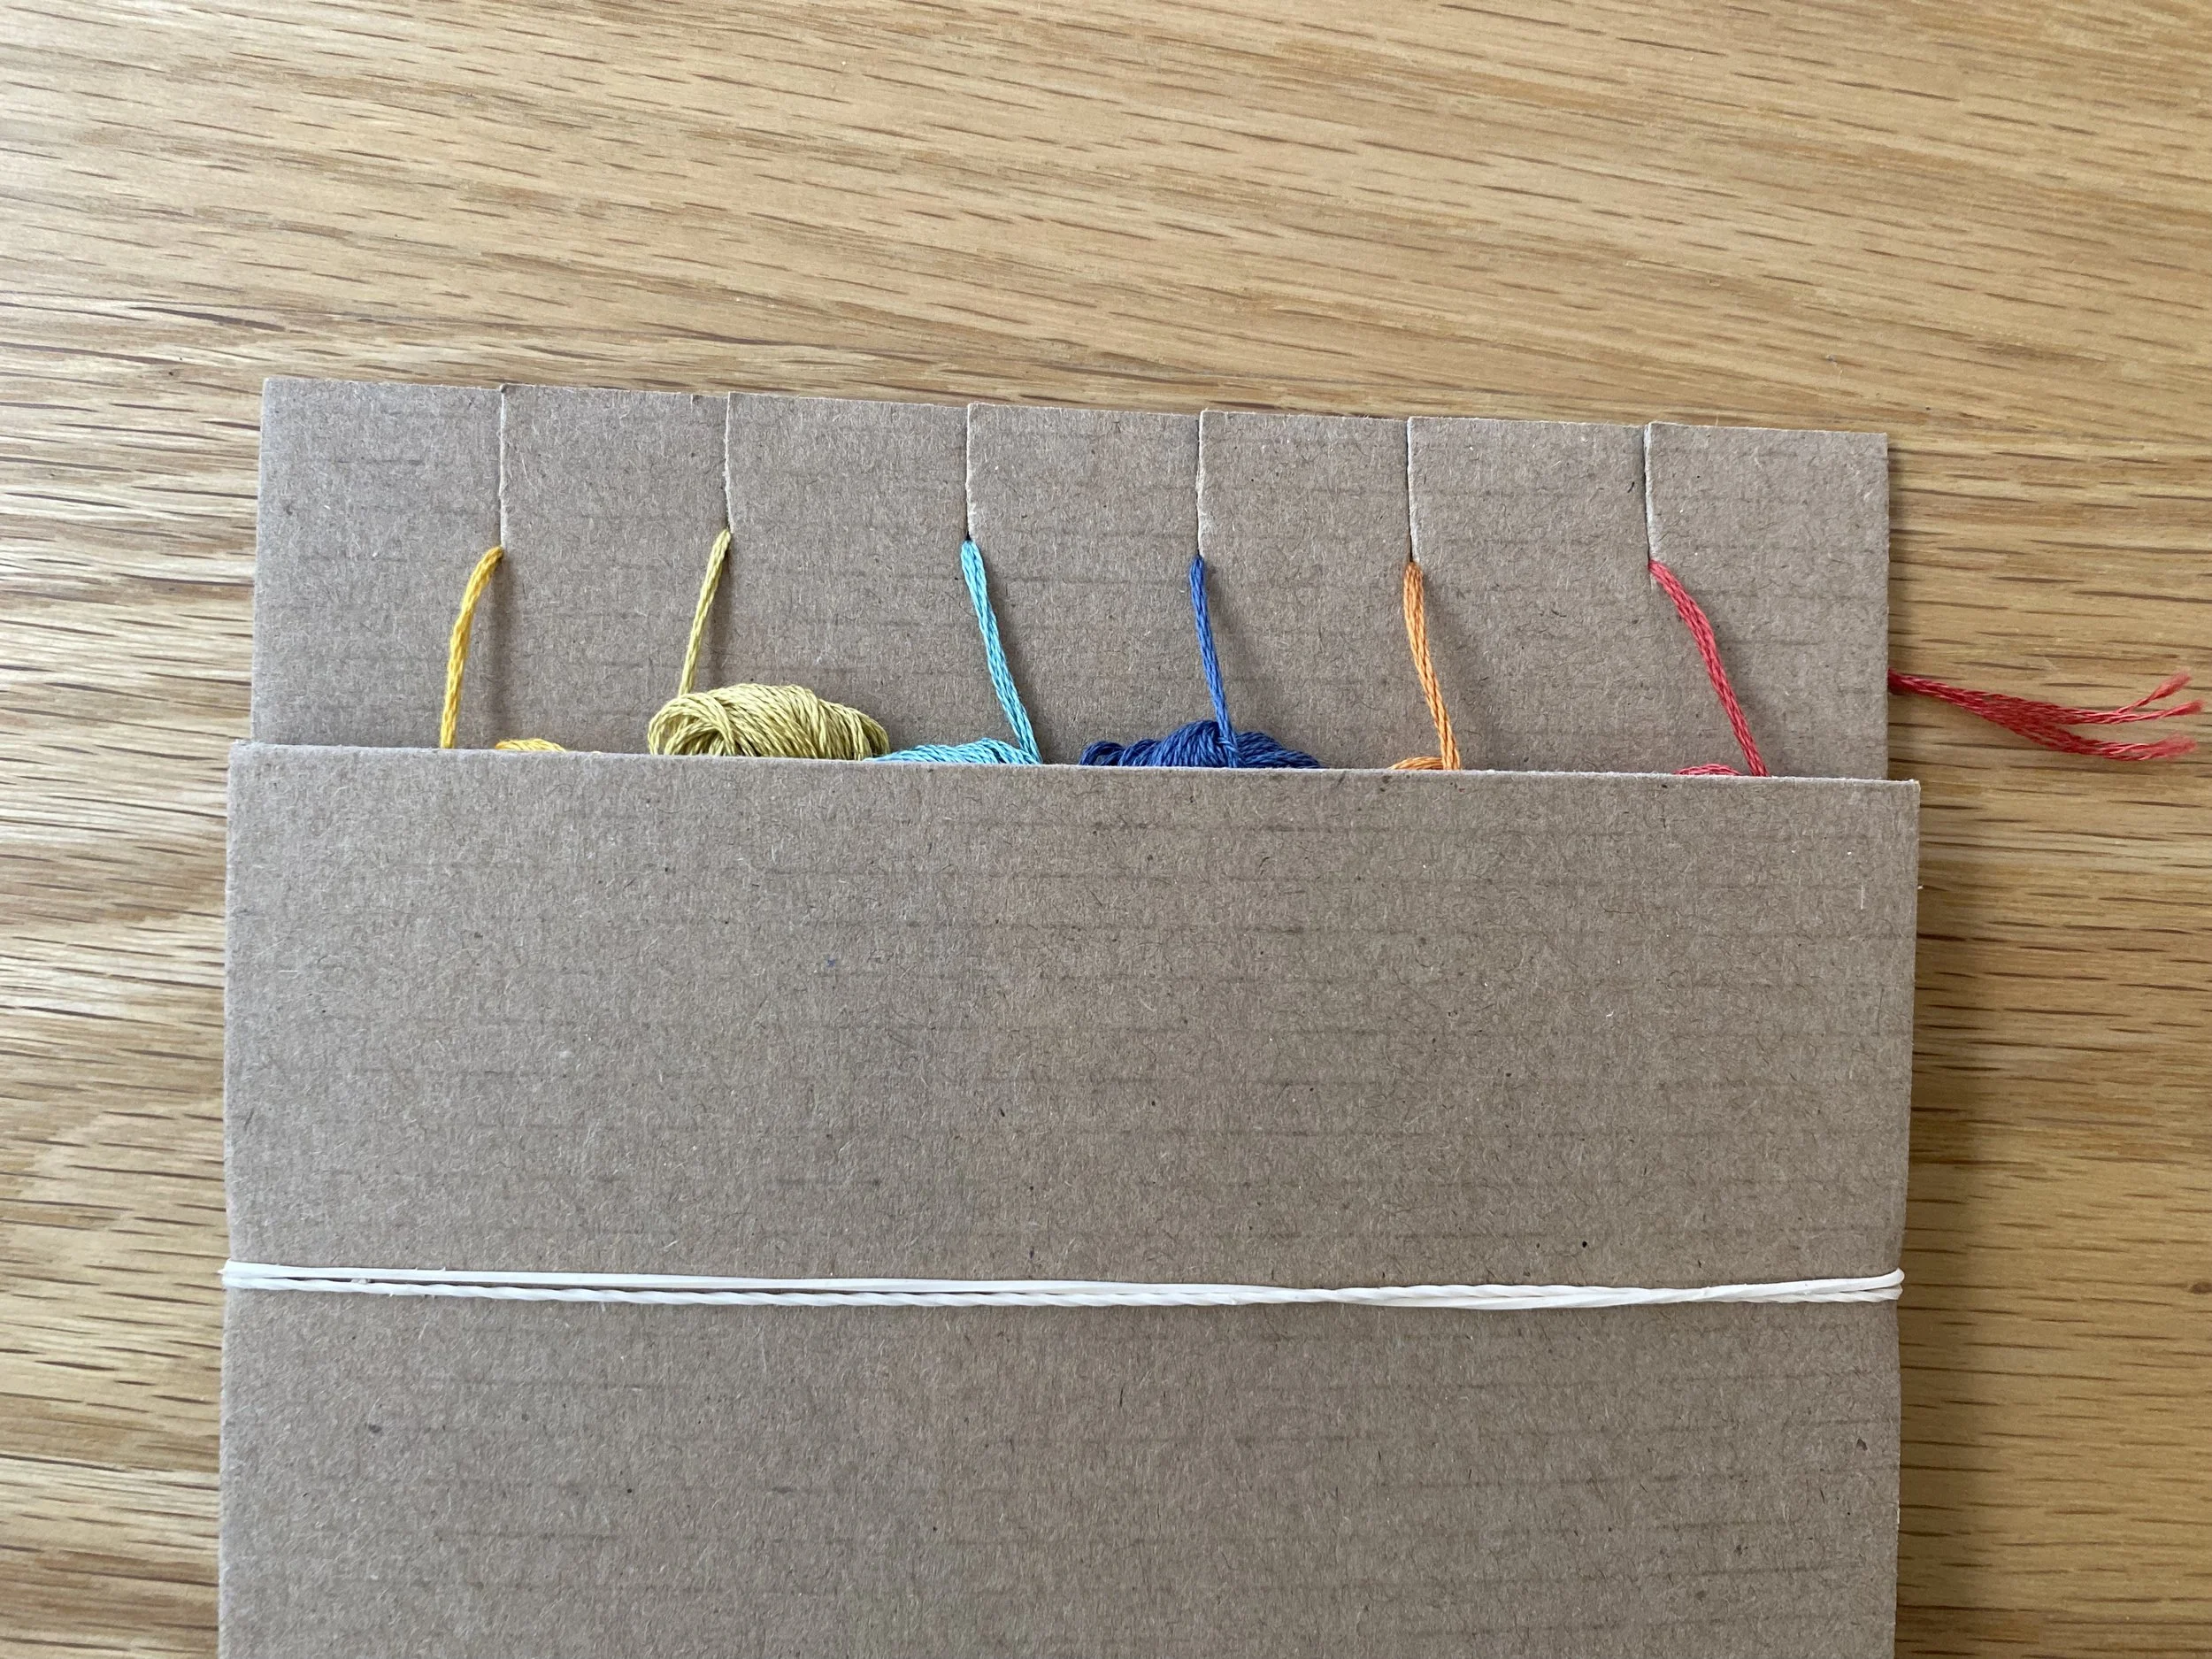
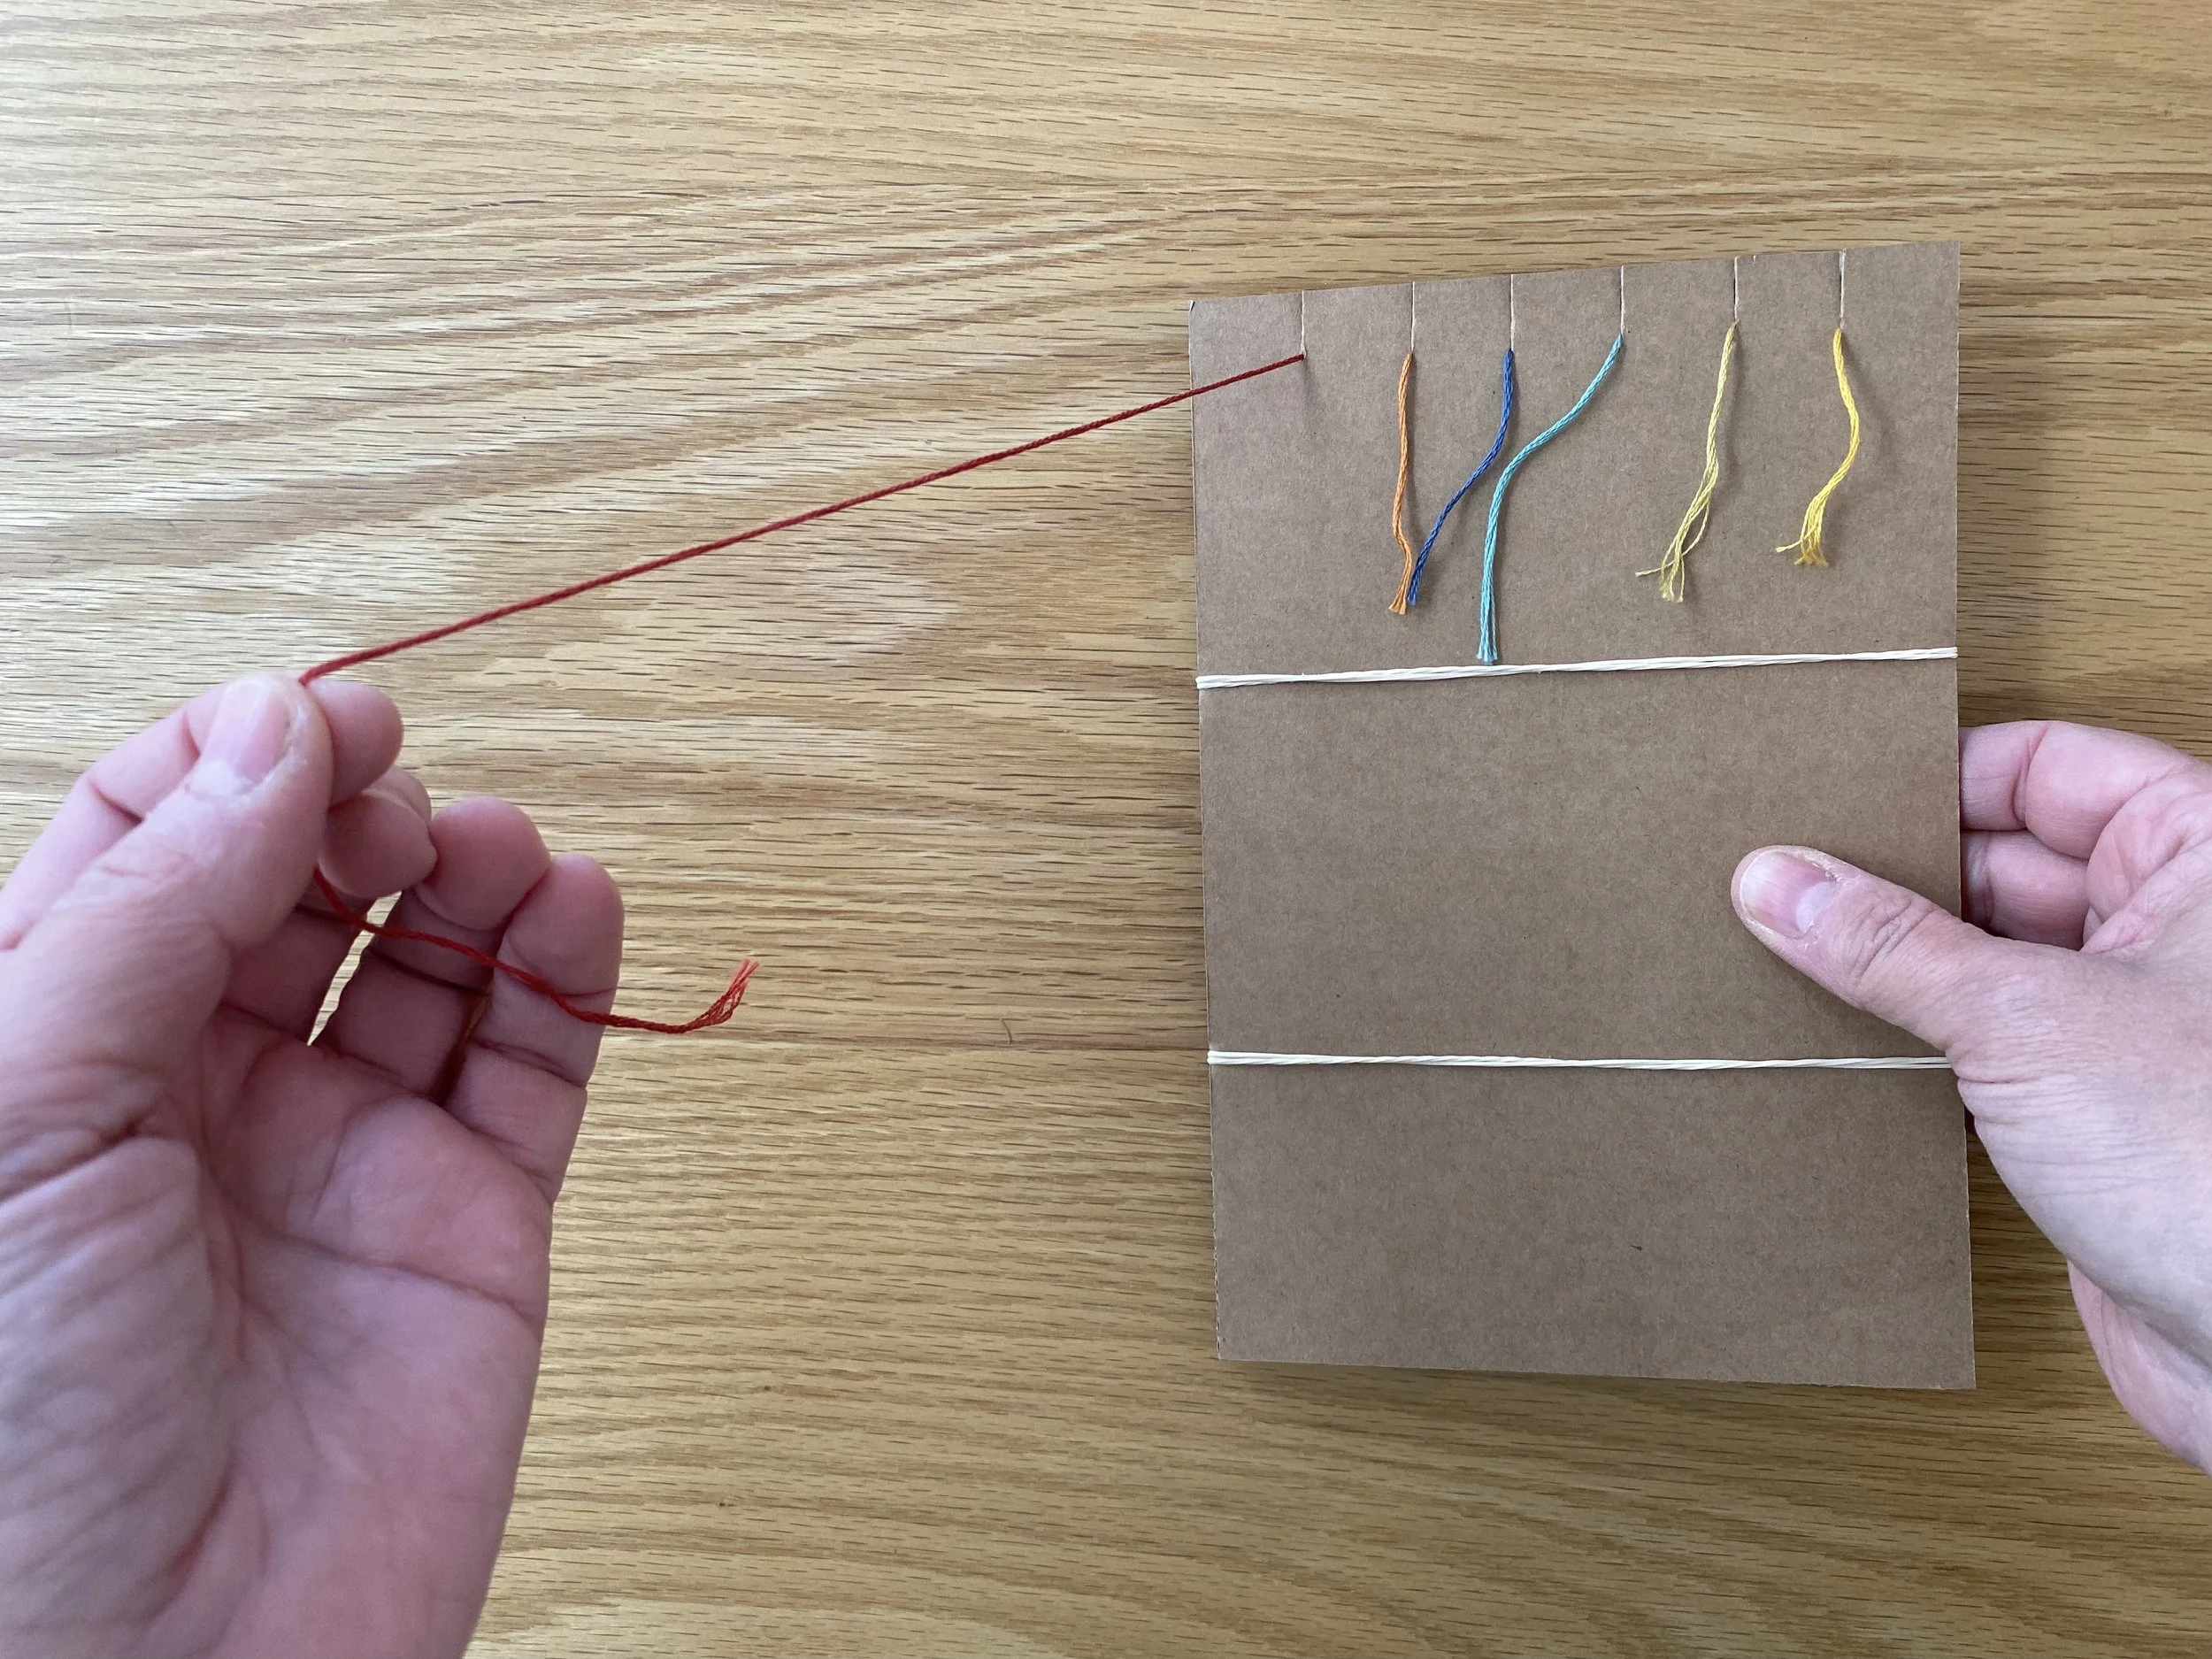
**Now listen, before you start doing cartwheels…. this only works 99% of the time.
Why? Not because my incredible invention is faulty, but because every now and then you’ll get a skein of thread that doesn’t come out smoothly. You know what I mean right?
Sometimes you pull the thread, (from the correct end of course) and nine times out of ten it comes out perfectly. But every now and again it gets a little tangle inside. You’ll just need to open up the Thread-O-Matic 3000 and take out that skein and use it manually. Or replace it with another skein.
🪡
You can make several Thread-O-Matic 3000’s and have your individual project skeins together with each project without getting messy or bundled up with fabric, scissors and needles.
When a skein is coming to the end you’ll find that the last piece of it should easily just pull out. Sometimes when one of my skeins is coming to the end it kind of pulls out of the Thread-O-Matic 3000 together with the little plastic tags. You’ll get to know it as you use it, but I have no doubt you’ll love it.
Let me know what you think in the comments and when you make your own I’d love to know how it’s working for you.
Close Up
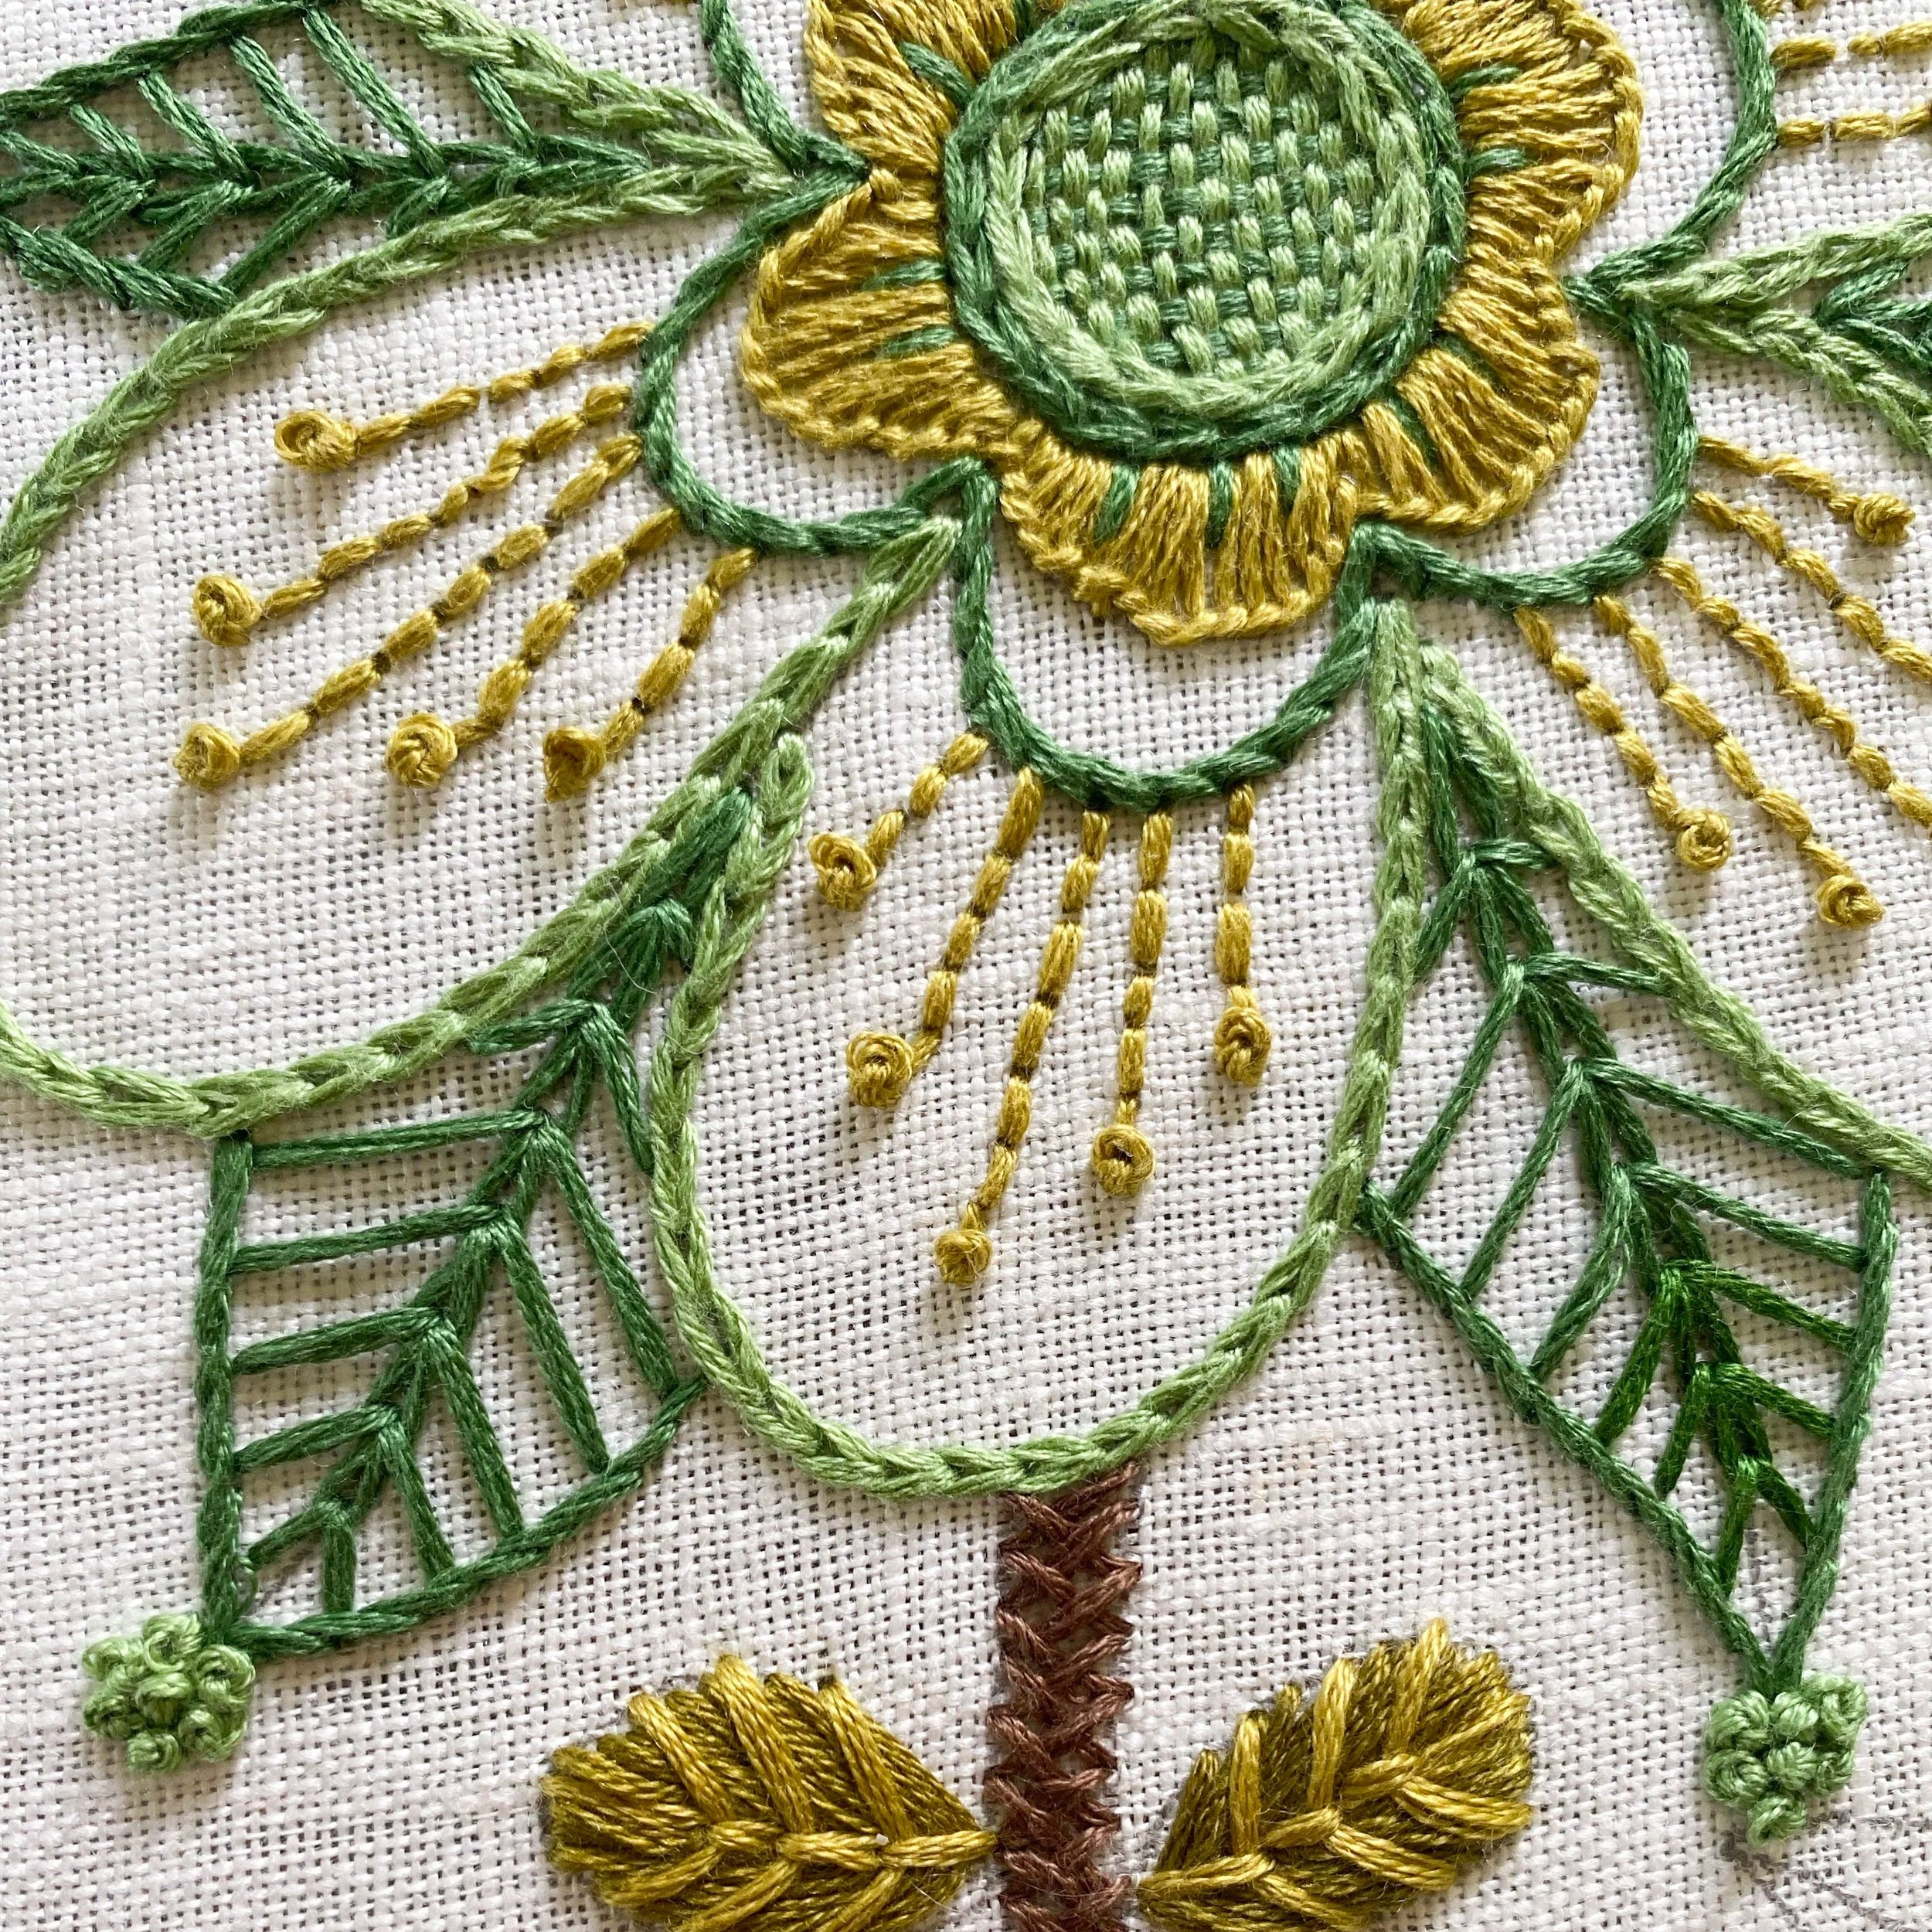
Back in April i designed a pattern for The Wednesday Tribe that included the use of the Wheatear Stitch. You can see it on the big leaves protruding from between the petals here. It’s kind of a combination of a chain stitch with a fly stitch… kind of.
Here are the step by step instructions if you’d like to give it a go. It’s a wonderful filling stitch for leaves and a beautiful border stitch too. Once you get the hang of it you’ll breeze through it. Also I outlined the above leaves in a stem stitch.
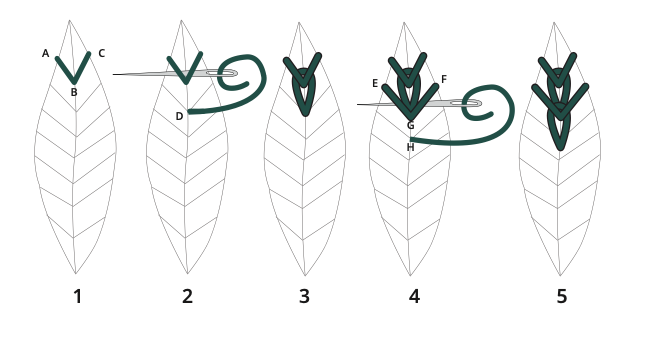
1. Create a simple “V” stitch by coming up at A, going down into the centre at B, coming up at C and then again going back into the centre at B.
2. Next come up below the “V” at point D. Slide needle under the “V” stitch as shown. Stab needle back into D to finish the little chain.
3. Your first wheatear stitch should now look like this. It’s like a chain stitch sitting under a “V” stitch.
4. Next make another “V” stitch by bringing your needle up at E, down into the centre at G (which is the same hole as the base of the chain stitch), back up at F and then back into the centre at G again. Now, once again come up below the “V” stitch at H, and slide needle under both the “V” stitch and the above chain stitch, as you can see in the diagram.
5. You should now have two wheatear stitches that will look like this. Repeat from 4 to make more wheatear stitches.
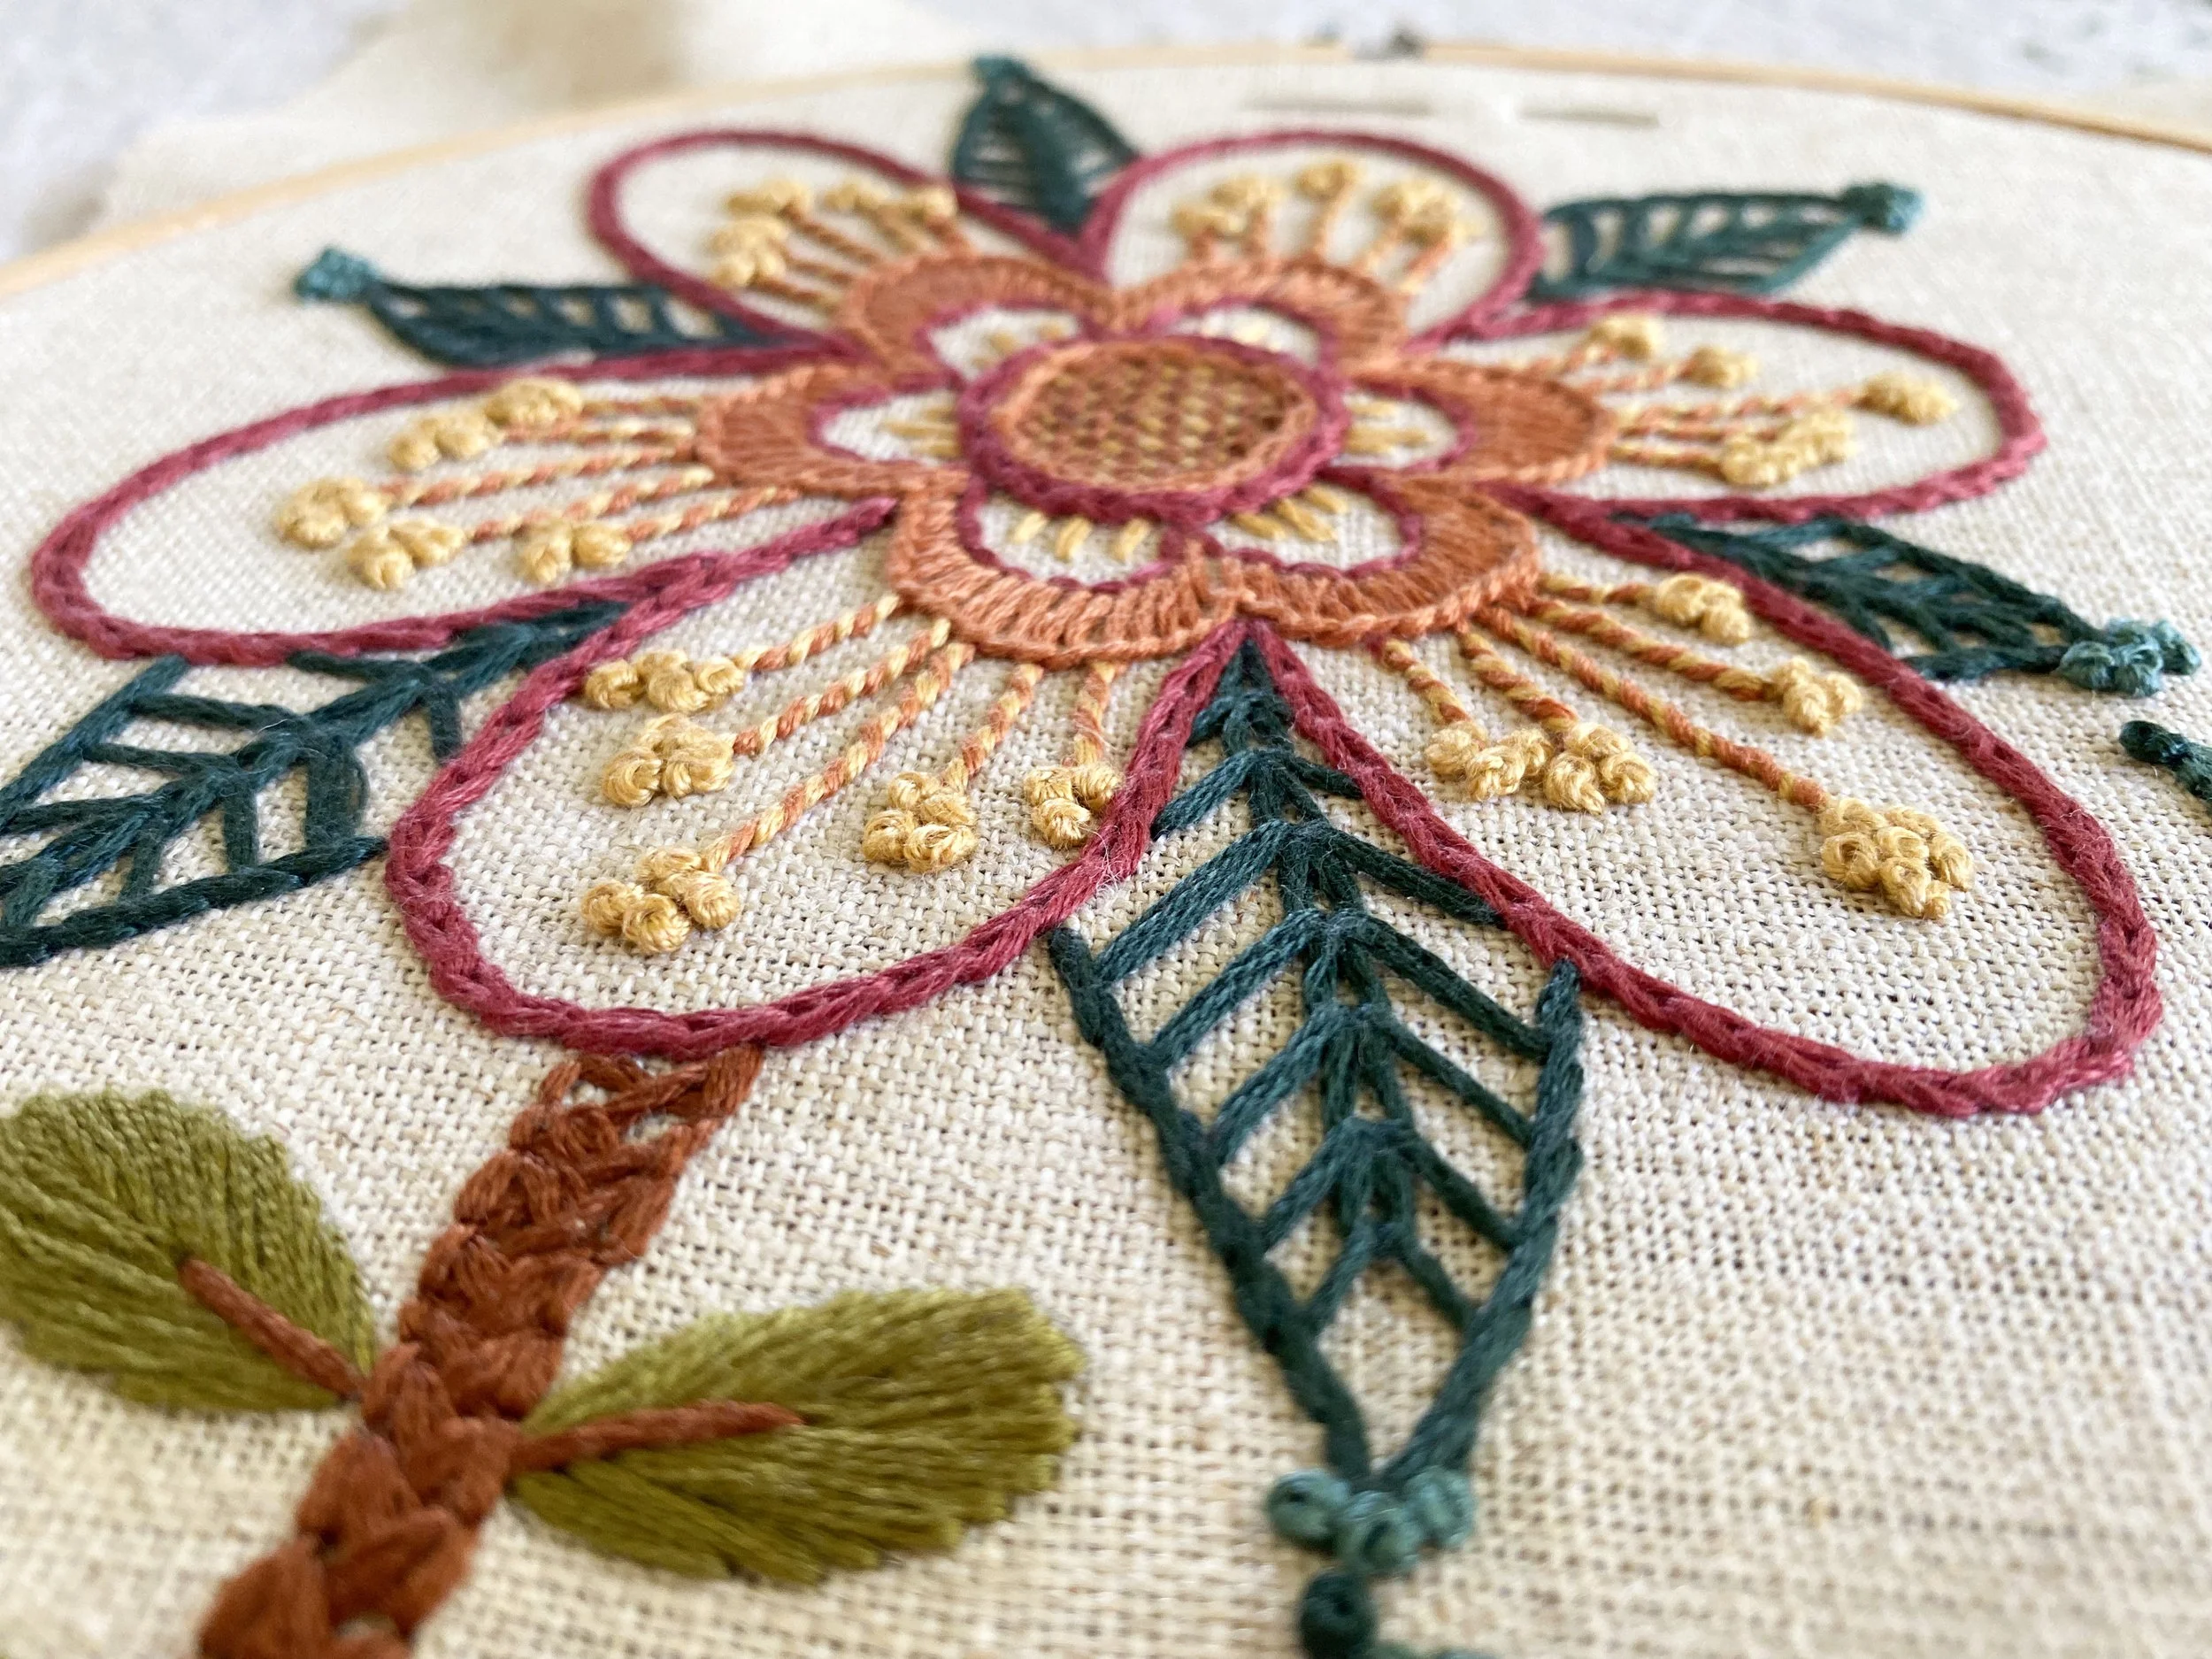
Same design, different colours. Big leaves done in Wheatear Stitch.
Maker Of The Week
- NAOMI TG -
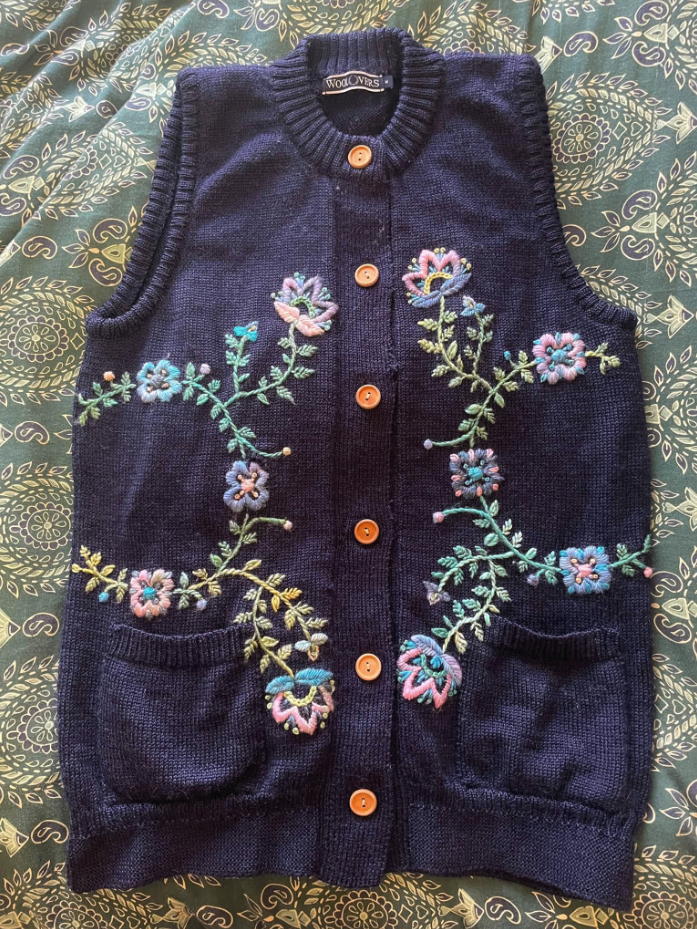
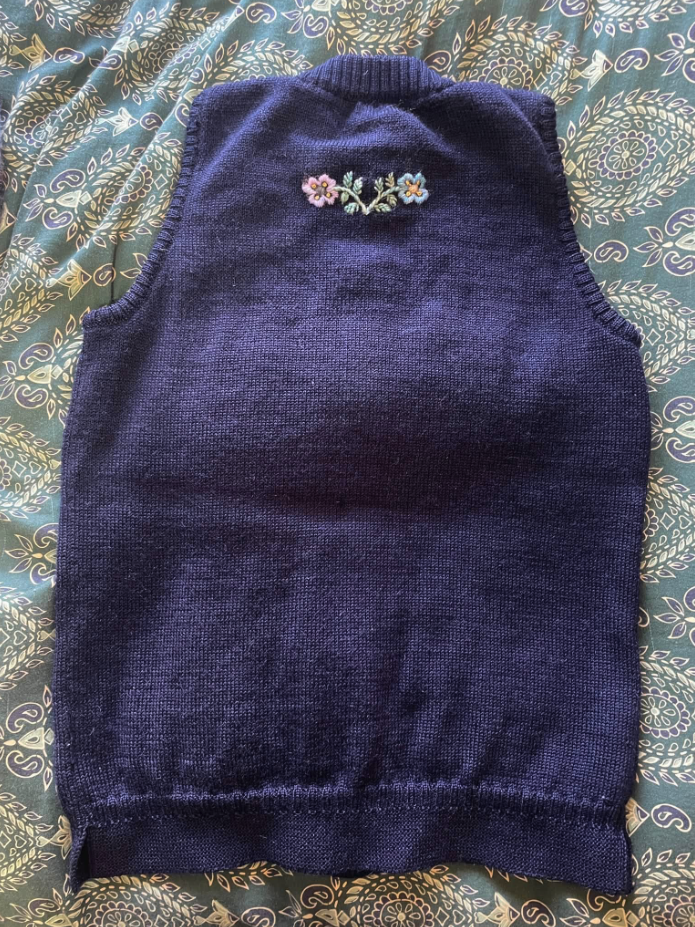
Will you take a look at this gorgeous woollen cardigan?! It was stitched into beauty by Naomi who shared it in our Facebook group just a few days ago. She said the cardi was bought years ago then forgotten in a cupboard for a long time where moths got to it. She decided to add the embroidery over it to cover the holes and in the process made this stunner. Naomi used the “Catherine” PDF pattern with a variegated yarn she had left over.
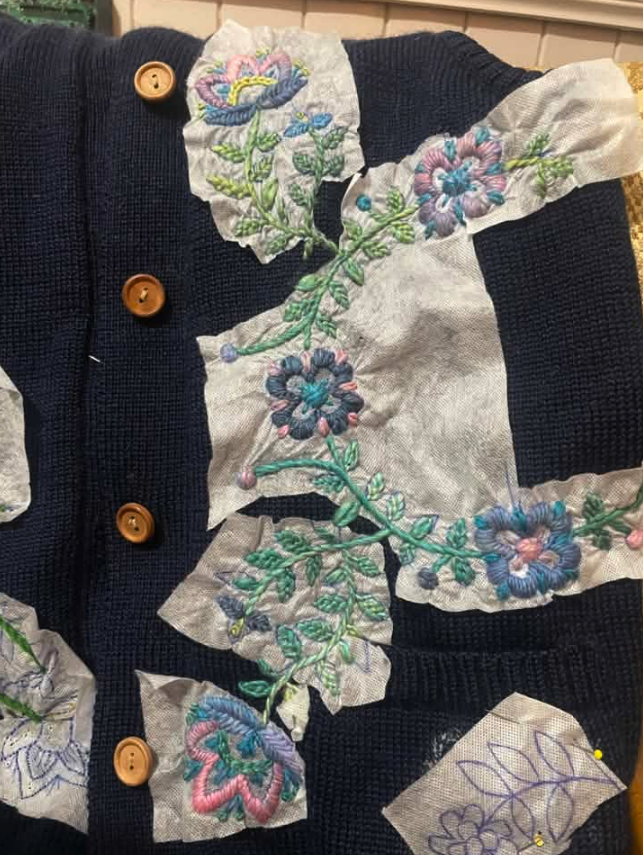
She used a water soluble stabiliser and even shared a photo of it which is super helpful for those who like to see works in progress.
She says she wants to change the buttons on it still and finish off the back. I ADORE it exactly as it is, but when or if she does make more changes I hope she’ll share it!
From The Tribe
After seven months of designing patterns, sharing them with the members and most importantly seeing the results coming back, I am uplifted and filled with joy every time I see a project one of our members shares with me.
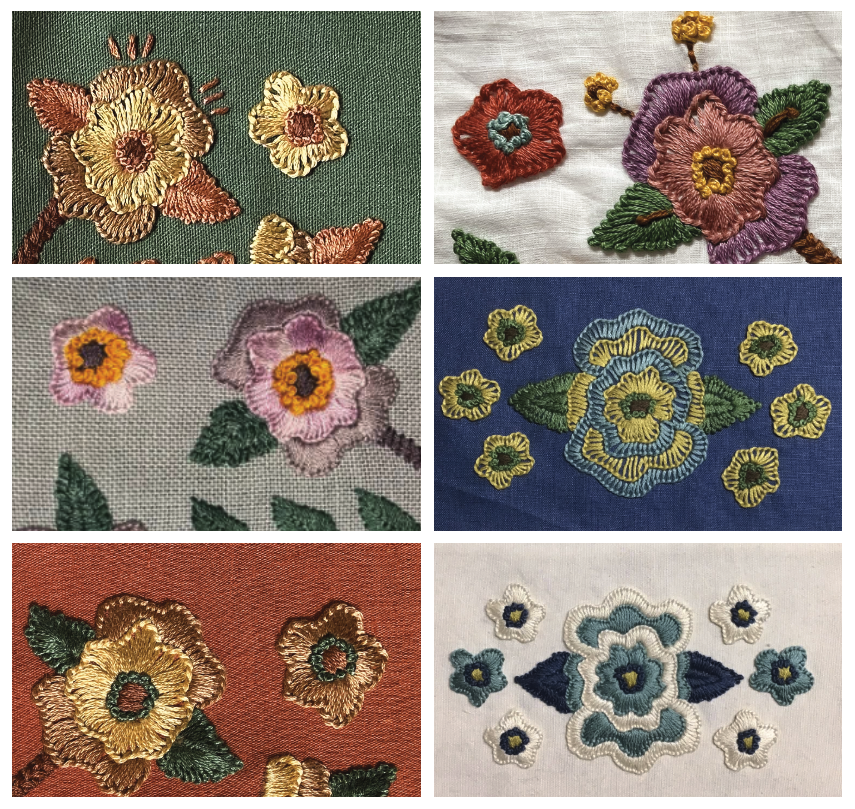
Last week I shared four versions of the June pattern as stitched by our members and it never ceases to amaze me just how beautifully each persons preferences are expressed in their colour and stitch choices. This week I thought I would make a collage of the different colours so you can see just how much things change when you swap out threads or fabric colours.
Centre left is Clarinda’s piece and bottom two in the right column are by Philippa. The others are from my original design for the July issue.
Wednesday Tribe members…
Listen up. Every week Johnny (my partner) bakes banana bread. And every time it comes out of the oven smelling all fresh and delicious he always says: “I think this is the best one I’ve ever made”. I agree with him every week.
Secretly that’s what I have thought at the end of each month as I finish designing our new pattern.
But this month I mean it and I’m shouting about it! I am soooo in love with the August pattern that I am willing to bet my half of the banana loaf, that your eyes will pop out of your head.
Your pattern arrives Monday 3rd July.
🌸🪡🌼
Till next week!
Phew! That’s a lot of talking haha!
Next week I’ll have another story for you about my grandmother Helena and the last words I remember her saying to me before she passed. So many of you enjoyed last week’s story that I will tell you a few more about her. There will also be stories of my other grandmother Halina and the ring she left me. My great grandmother Olga and her garden of peony roses and her hand rolled menthol cigarettes.
And I won’t forget the men.
My grandfather Stanley and his workshop of inventions. My father Henryk, his carpentry skills and a story he shared how he got his first pair of shoes at the age of seven.
And also stories from my own childhood like when my mother and I escaped from Poland and how a pair of orange curtains gave me hope as a ten year old.
Friends, I have enough stories to fill endless blog pages. I hope you enjoy your time here. I hope you learn something new, pick up new skills, find creative inspiration.
And I hope that the time you spend on this blog page leaves you feeling good.
Sending you so much love.
xxx
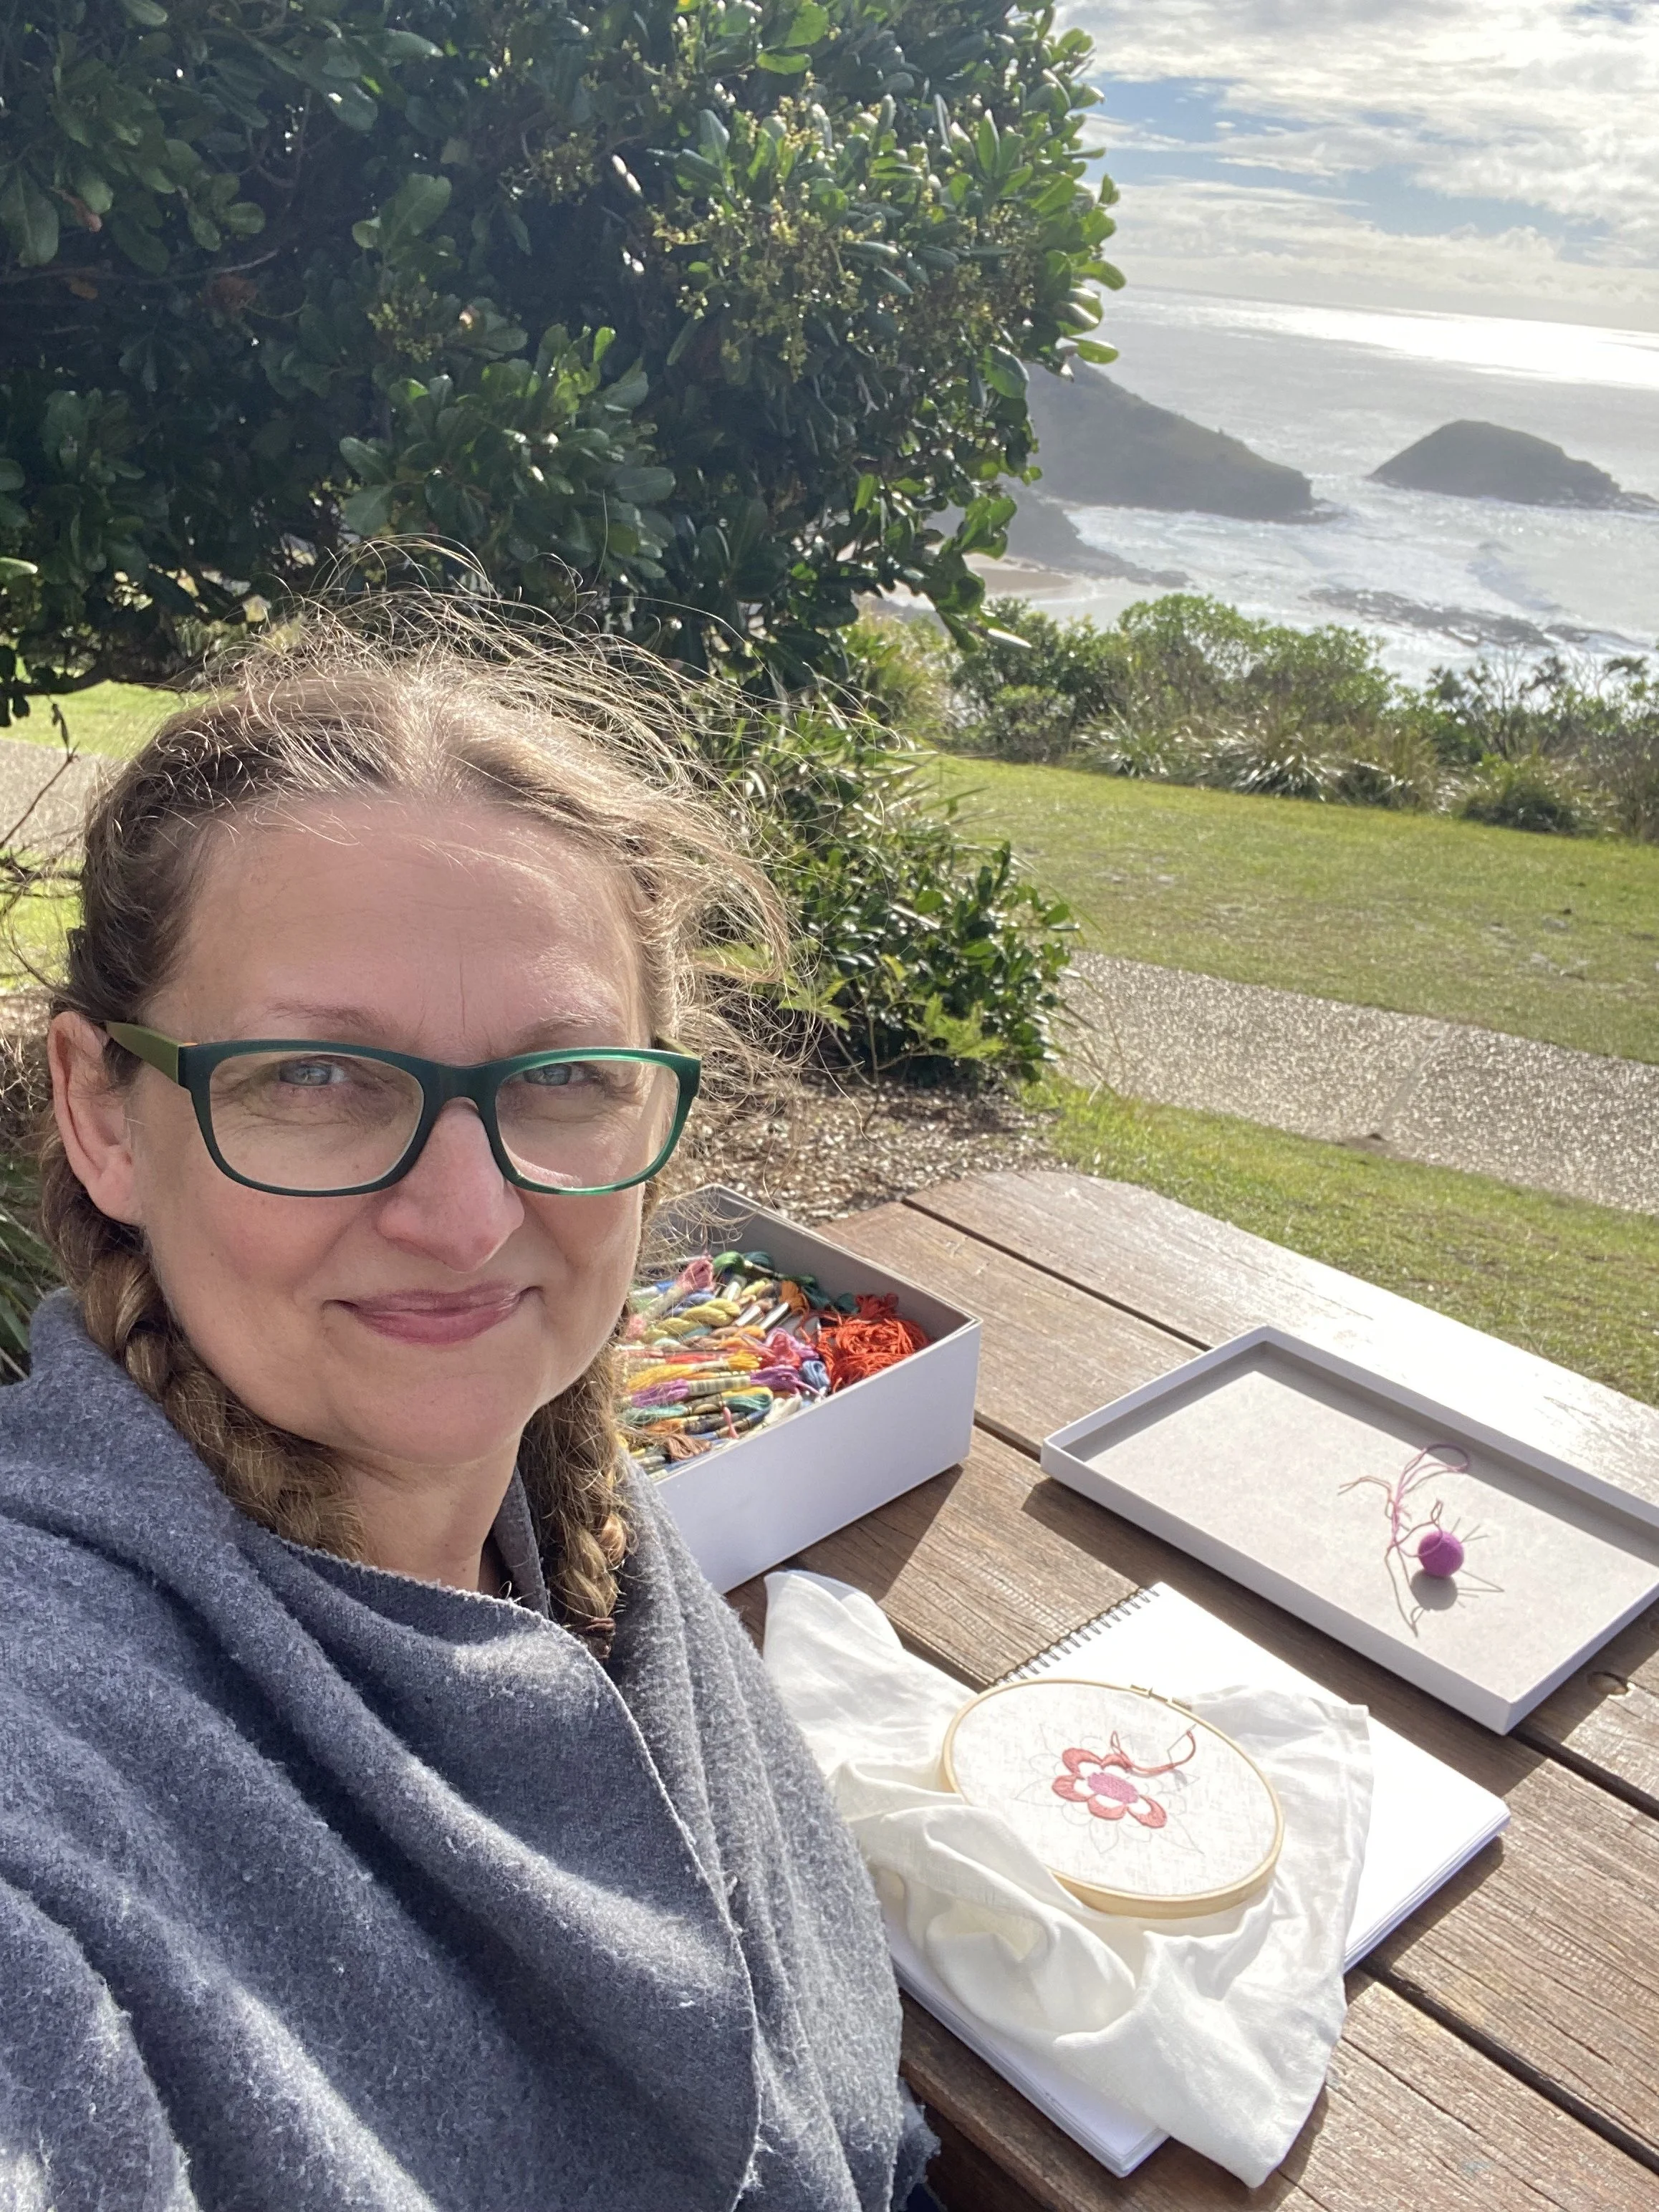
Stitching by the ocean. Pic taken on our trip a few weeks ago.